

📐 How to Draw — Step by Step
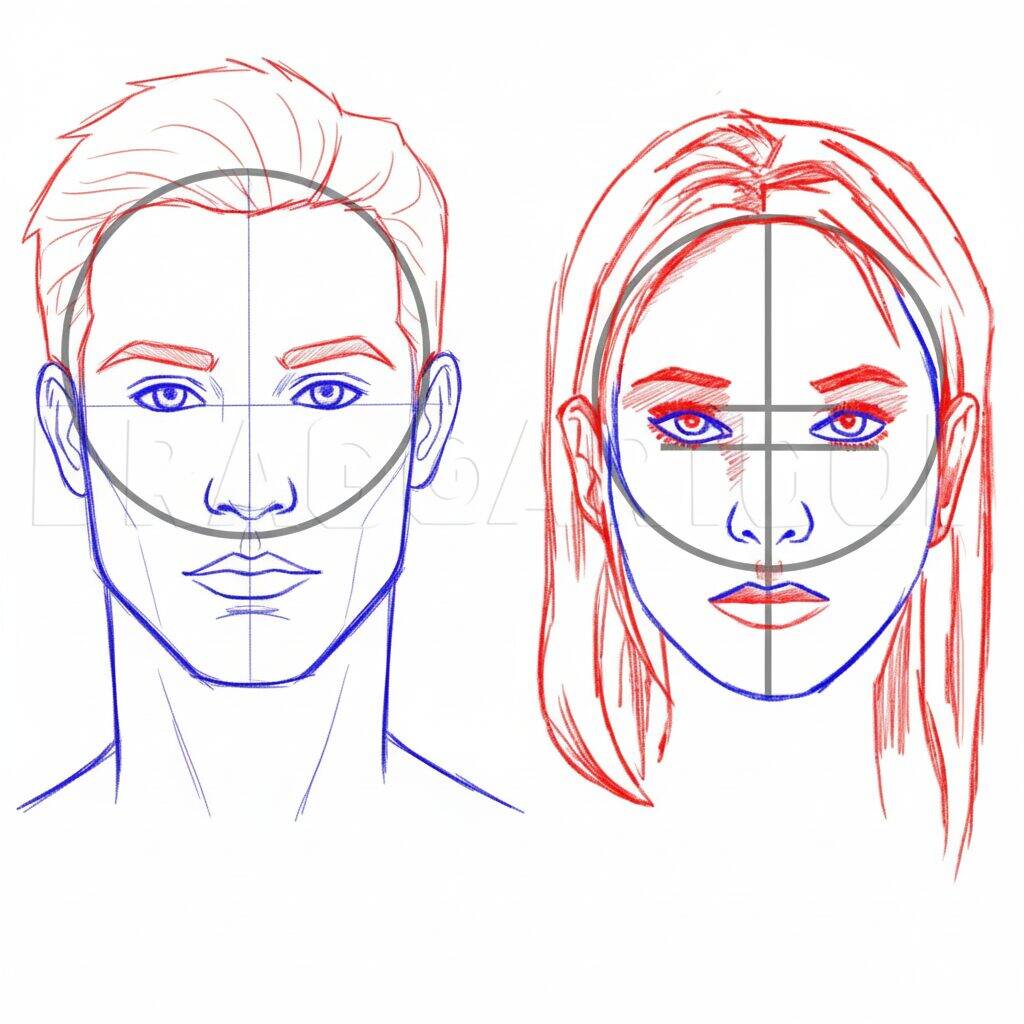
Step 1 of 6
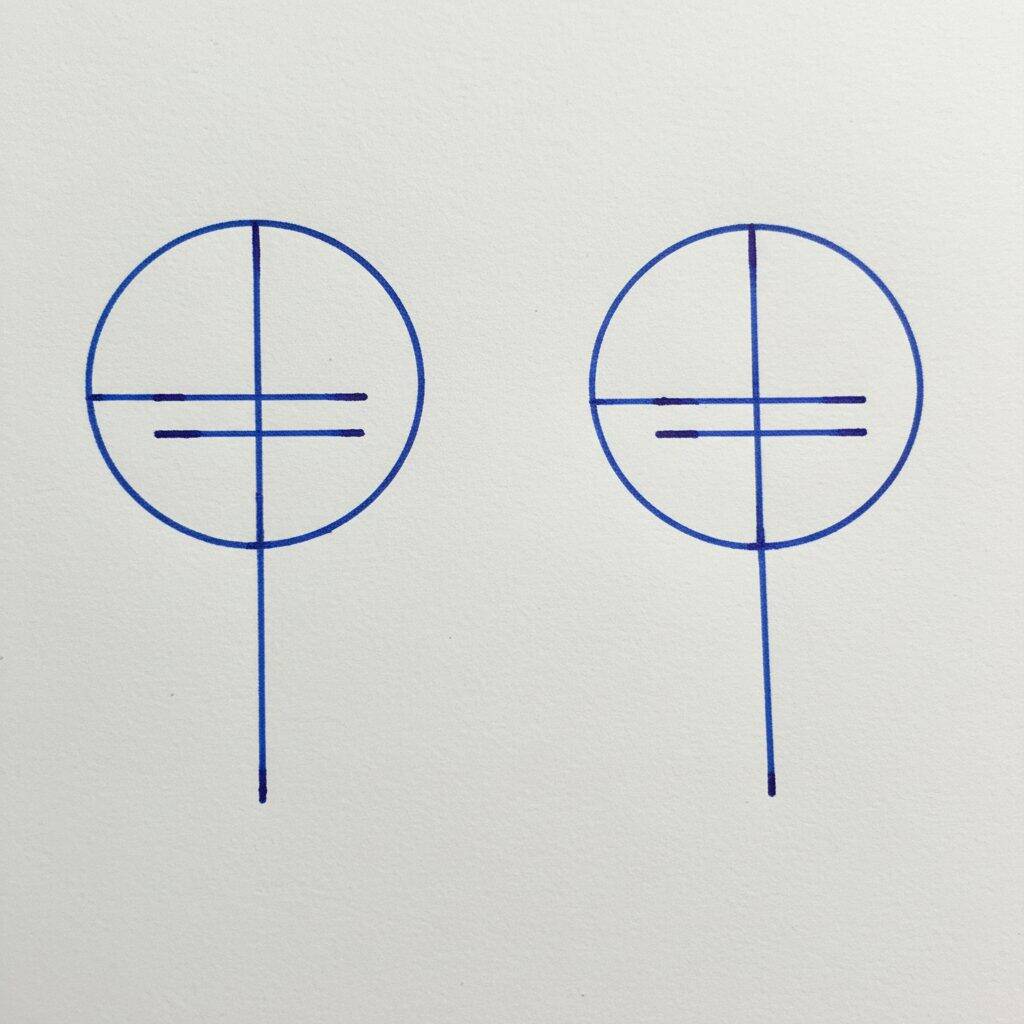
To start drawing a face, draw two large circles that will serve as guides for the head. In each circle, draw a vertical line and a horizontal line that intersect in the center, forming a kind of cross. These lines will help position the face elements further. Then draw a straight vertical line below each circle, which will represent the neck.
Step 2 of 6
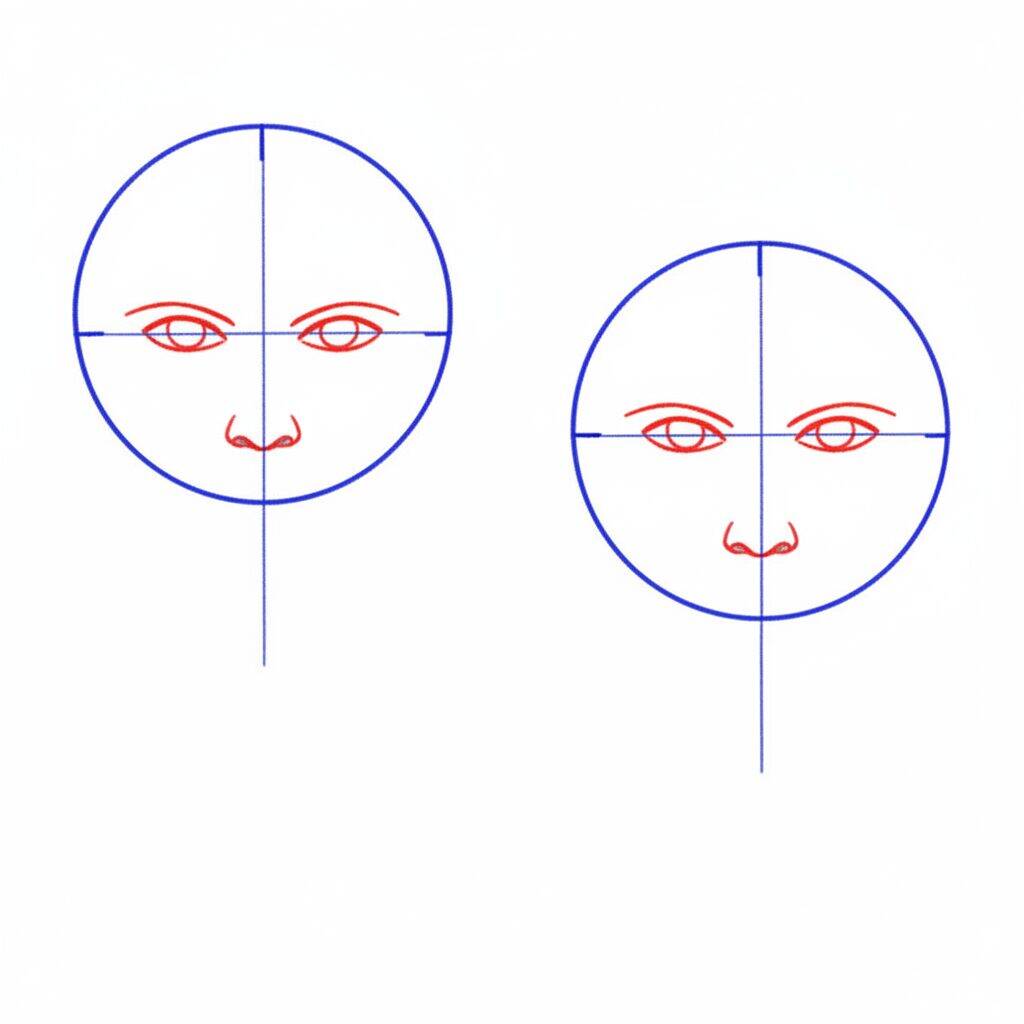
Now, let's add the eyes and nose to your drawing. Start by drawing two ovals for the eyes, positioning them on the horizontal lines you drew earlier. Make sure they are aligned and at an appropriate distance from each other. Then, draw a small dash or triangular shape in the middle of the vertical line to represent the nose. Remember, these shapes are just guides, so don't worry about getting them perfect at this point!
Step 3 of 6
Now, let's work on the mouth and eyebrows. For the mouth, draw a soft line across the bottom of the face, creating a slight arch that represents the lips. You can add a small line in the center to show the division of the lips. For the eyebrows, draw two curved lines above the eyes, following the shape of the forehead. This will give expression to your face. Keep in mind that these shapes can still be adjusted later!
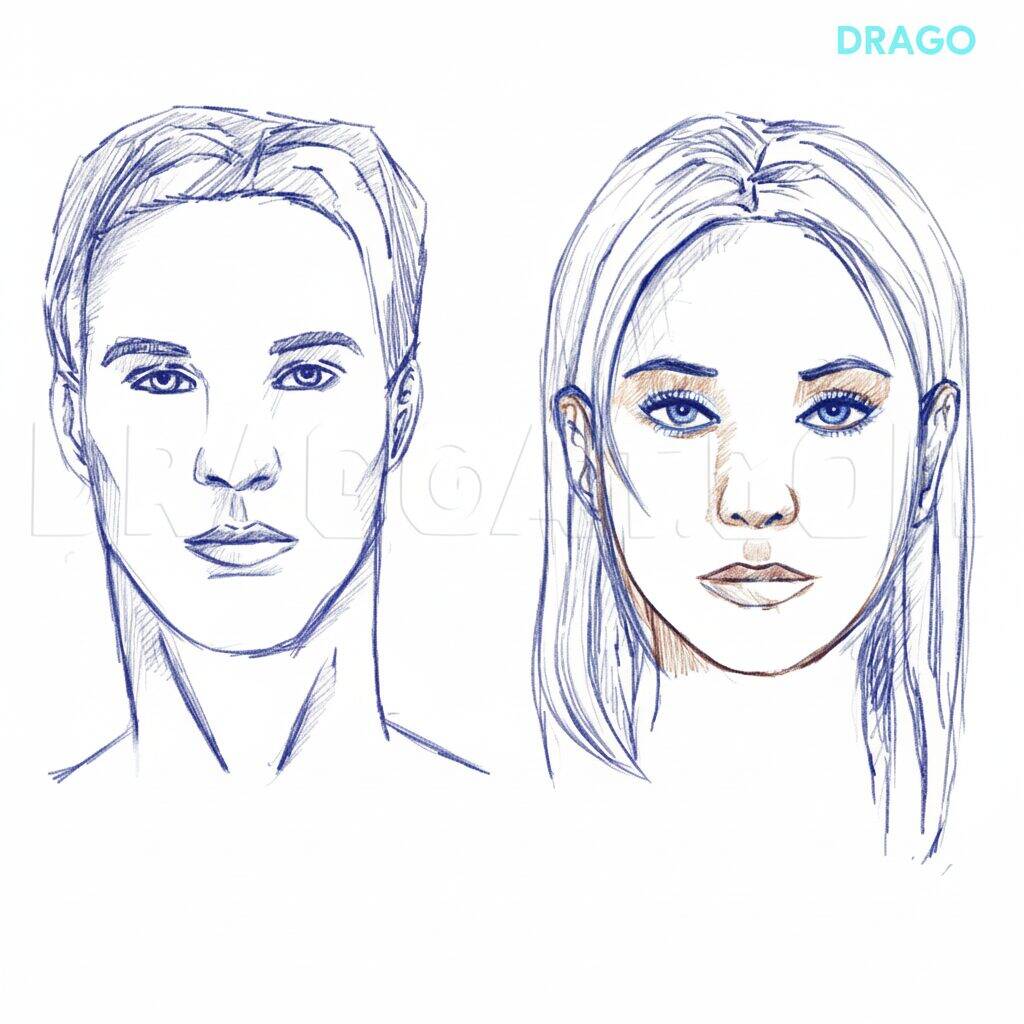
Step 4 of 6
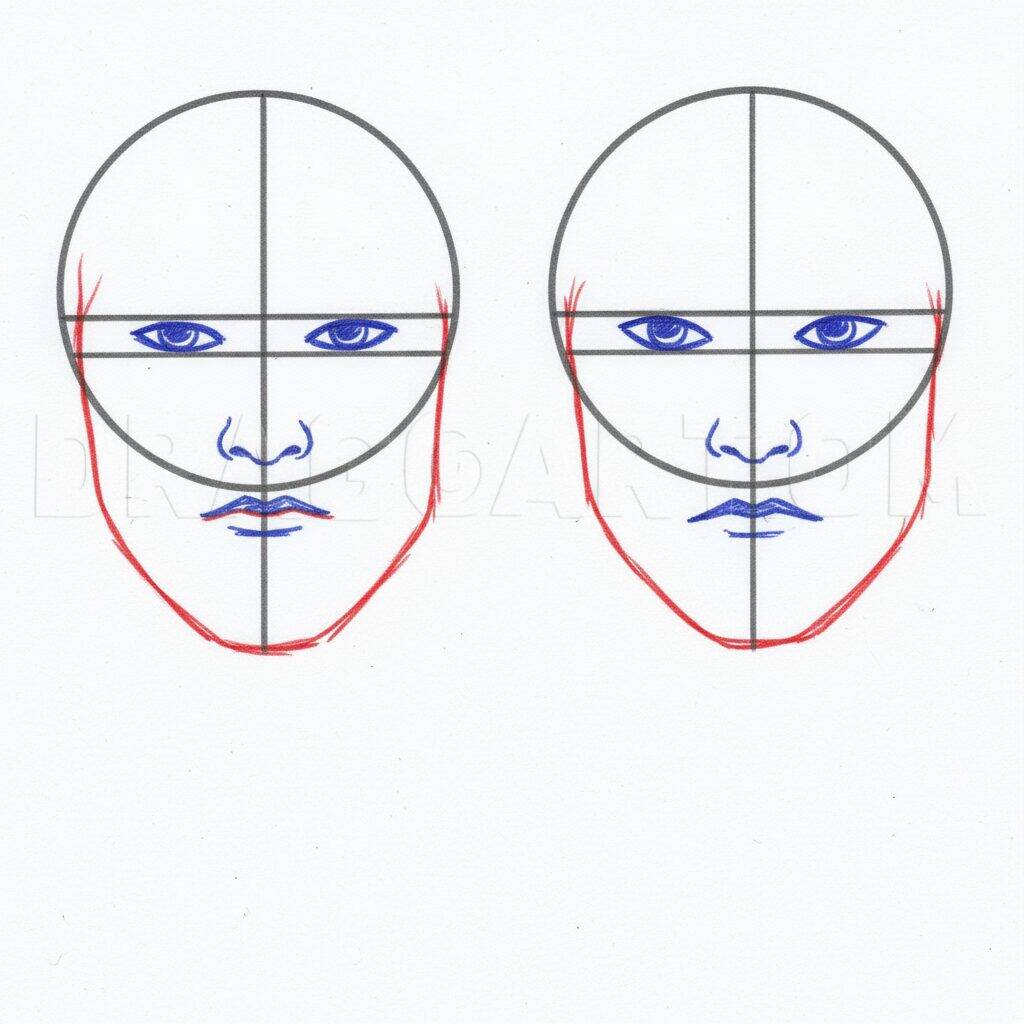
Now, let's add the eye details. Start by drawing the upper eyelids with smooth lines that follow the shape of the eyes. Then draw the irises and pupils in the center. Remember to leave a small reflection in the iris to give life to the look. To finish, add the lashes, making short, curved lines around the eyelids. This will help create a more expressive look!
Step 5 of 6
Now that the eyes are ready, let's work on the nose and mouth. For the nose, draw a smooth, triangular shape, connecting it to the base of the eyes. Then add the nostrils with small curves. For the mouth, draw a soft line at the bottom, creating the shape of the lips. Remember to lightly contour your lips to enhance your expression. Feel free to adjust the format as needed!
Step 6 of 6
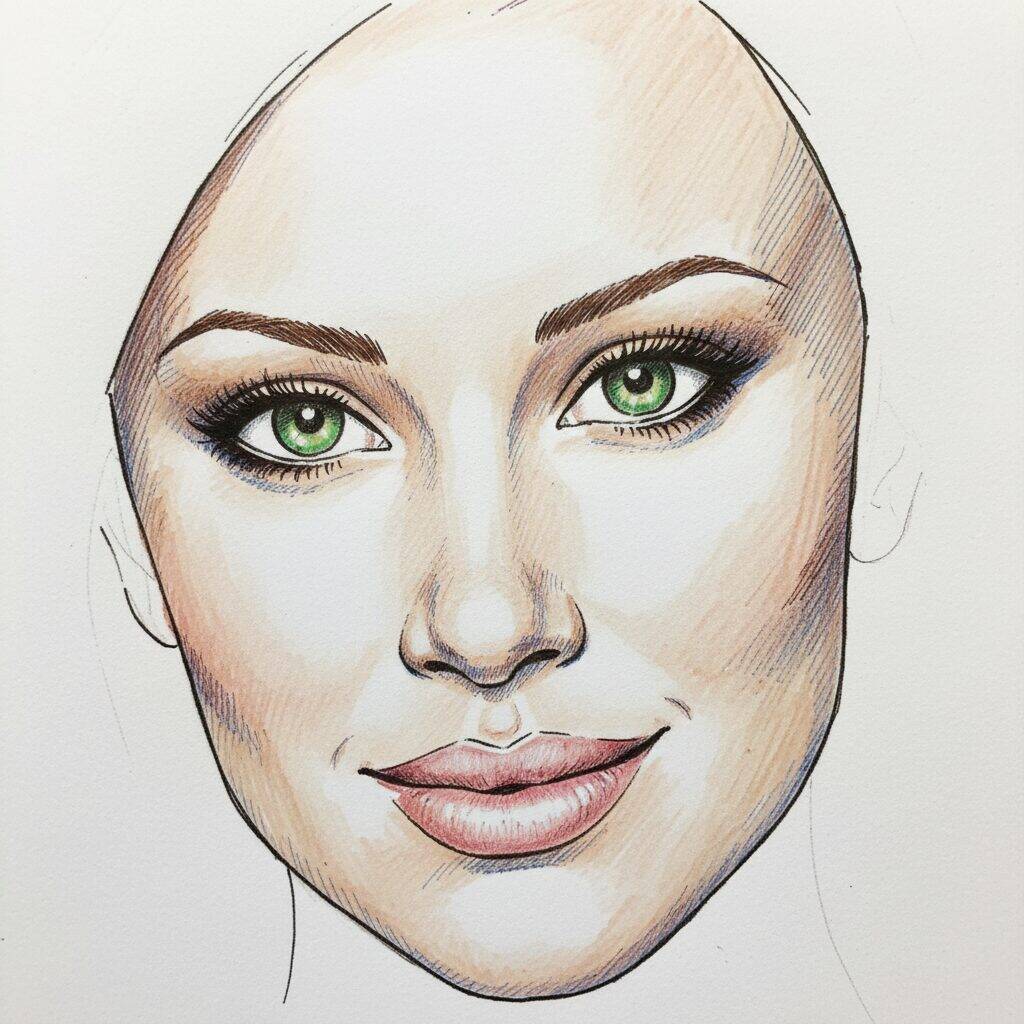
Now that the nose and mouth are defined, let's finish the face! Start by adding details to the eyes, like lashes and glitter, to bring the look to life. Then, refine the contour of the face, softening the lines and adding subtle shadows to add depth. Finally, adjust the hair, adding some highlights and texture. Remember to review the entire drawing to ensure everything is harmonious. Congratulations, you have completed your drawing!