


📐 How to Draw — Step by Step
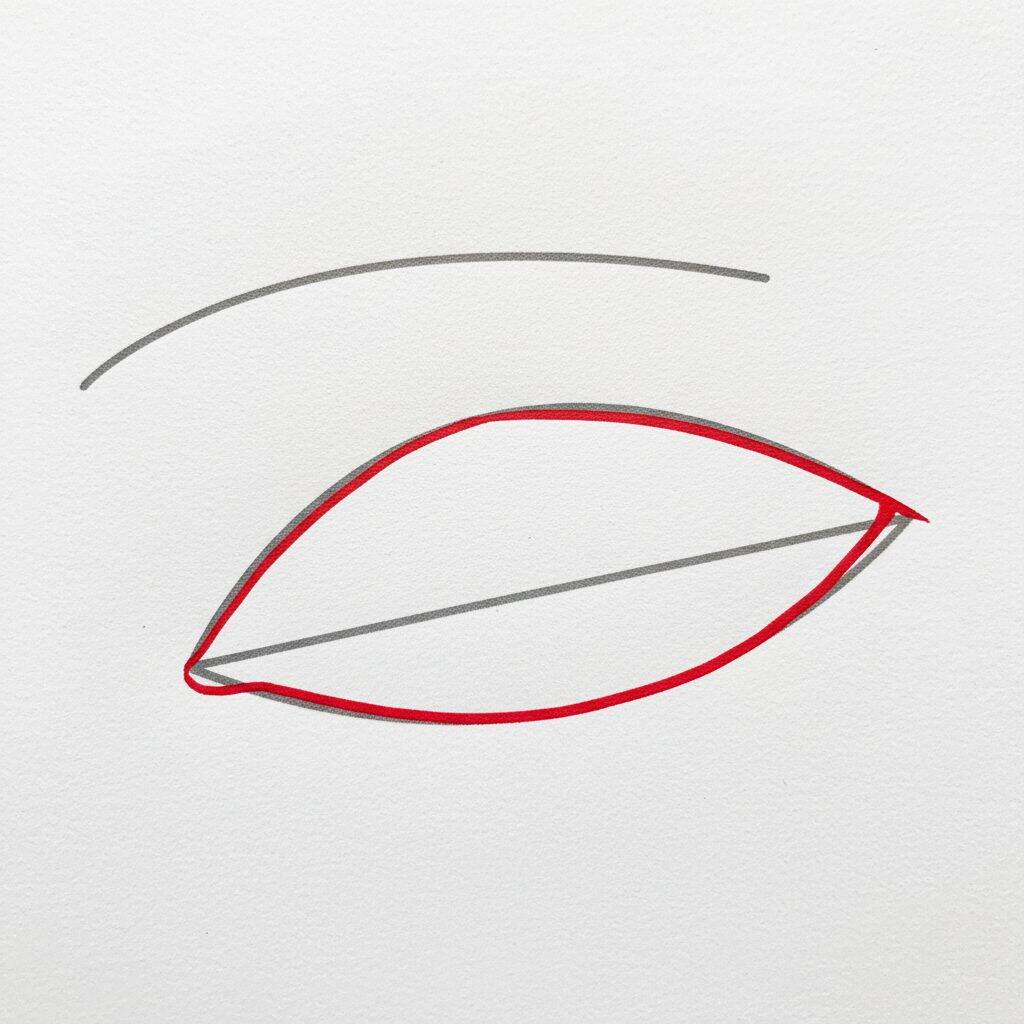
Step 1 of 7
To start drawing the eyes, draw a curved line at the top for the upper eyelid. Then create an oval shape, which will be the base of the eye. This shape should be a little wider in the central part and taper towards the ends. Finally, add a straight horizontal line in the middle of the oval, which will serve as a reference for the center of the eye.
Step 2 of 7
Now, let's refine the shape of the eye. Start by drawing the lower eyelid, which should gently curve upward, connecting to the ends of the oval you created. Then add a horizontal line to the bottom of the oval, which will serve as the base for the eye. This will give more definition to the format. Don't forget to keep the lines light to make adjustments easier later!
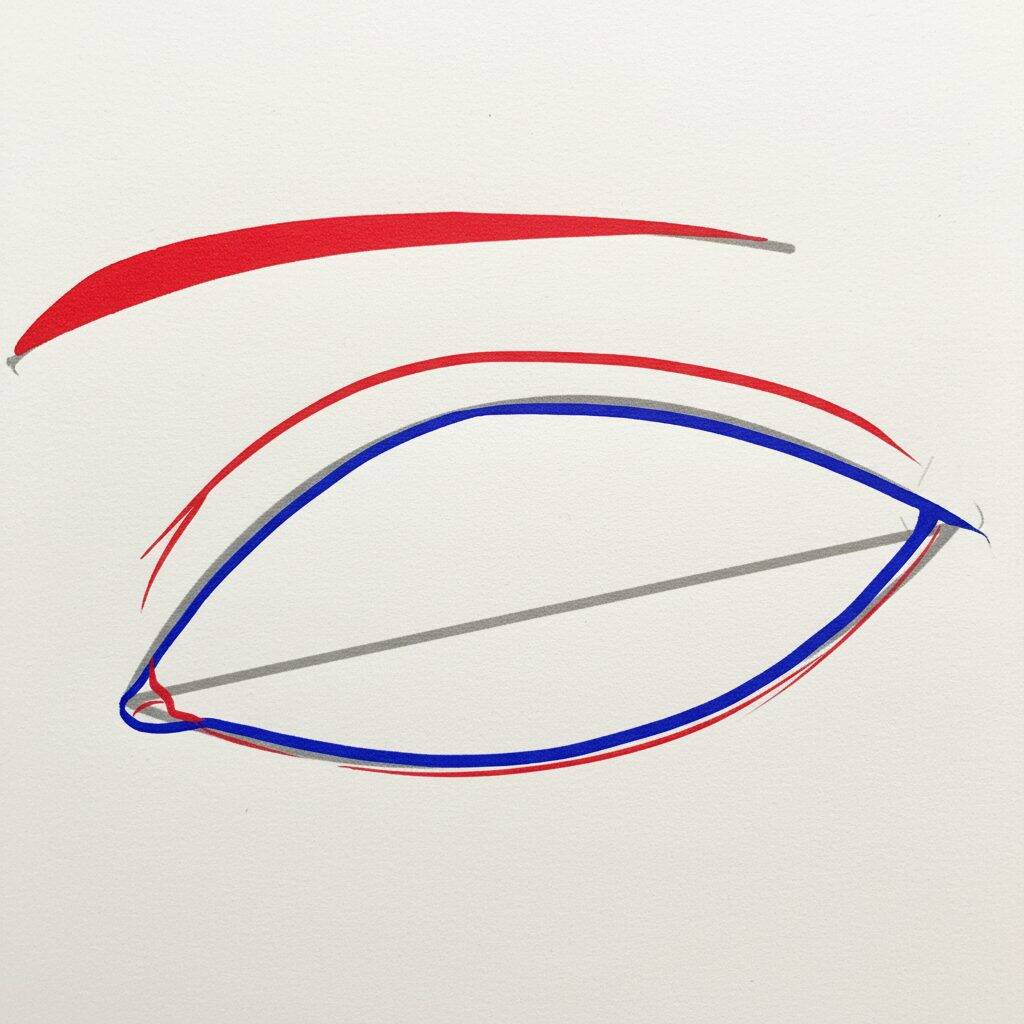
Step 3 of 7
For the next step, let's work on the shape of the upper eyelid. Start by drawing a curved line that runs smoothly from one side to the other, forming the top part of the eye. This line should be a little thicker to give more definition. Next, refine the shape of the eye by drawing a line that curves downward, connecting to the lower eyelid. This will help create a more natural look. Keep the lines light, as we will still be making adjustments!
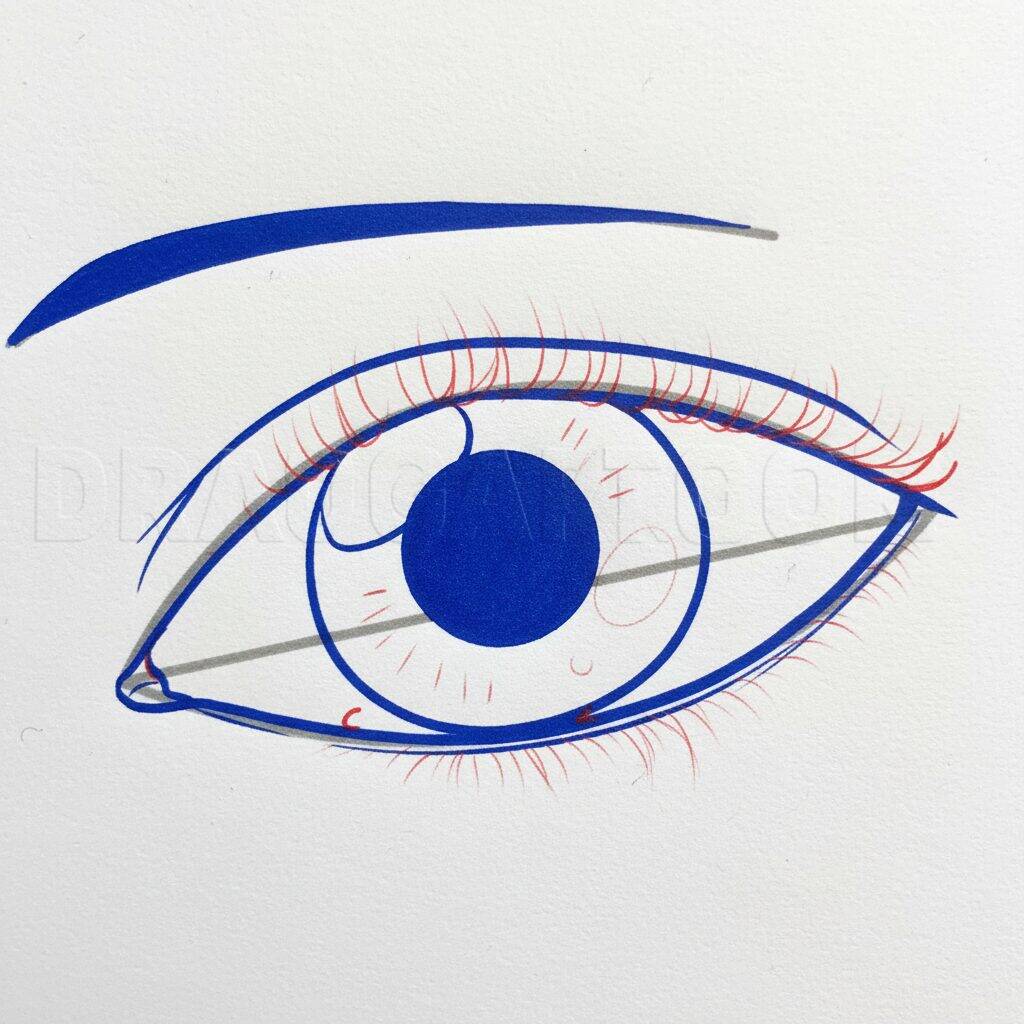
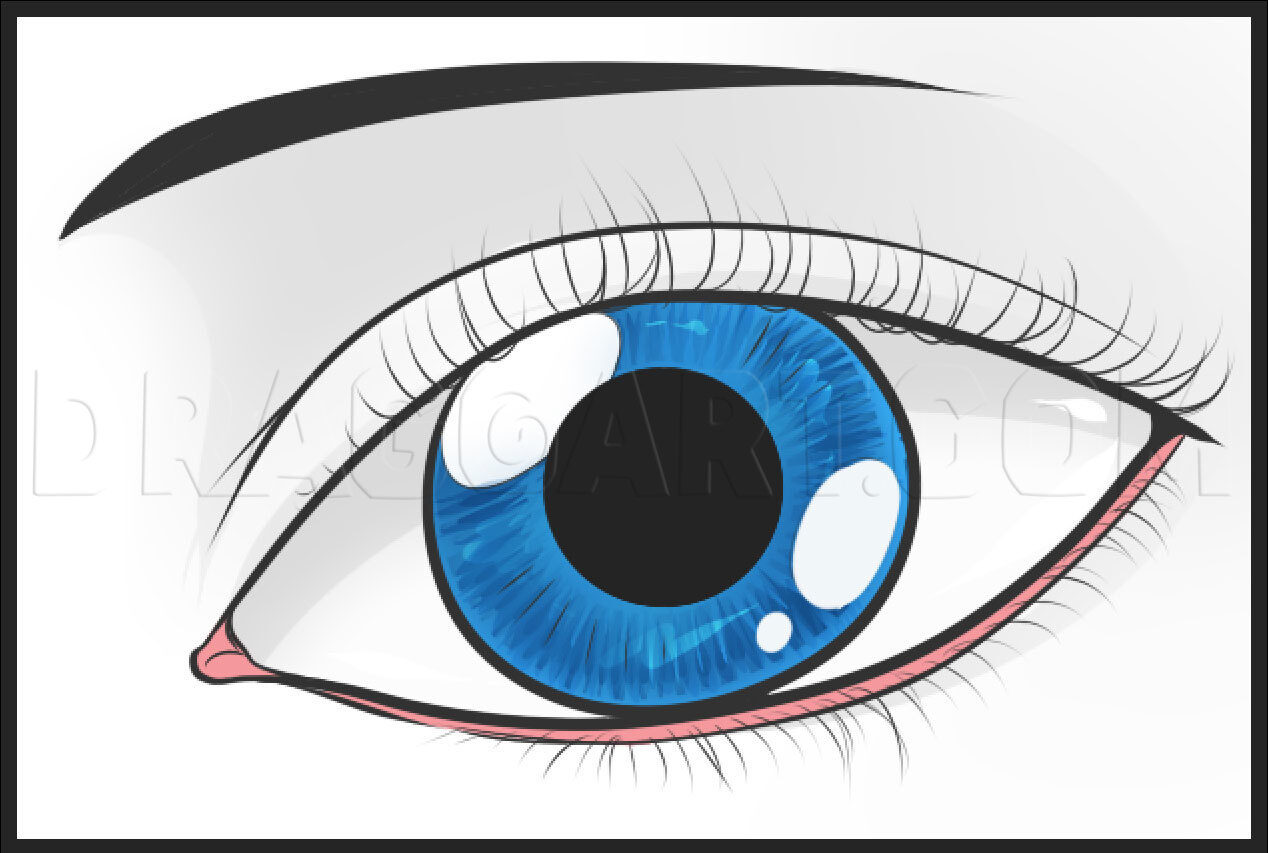
Step 4 of 7
Now, let's add more details to the eye. Start by drawing the iris, which is the colored part of the eye. Make a circle inside the eye shape you drew earlier. Then add the pupil in the center of the iris by drawing a smaller circle. To add more depth, you can add a light shadow to the top of the iris, as if the light is coming from above. Remember to keep the lines smooth and light to make future adjustments easier!
Step 5 of 7
Now, let's bring your drawing to life! Start adding the eyelash details by drawing small curved lines along the edge of the eye. This will give a more natural effect. Then add a soft line to the eyebrow above the eye, following the shape you've already created. To finish, draw a subtle line at the bottom of the eye to represent the eyelid. Remember to keep your strokes light and fluid!
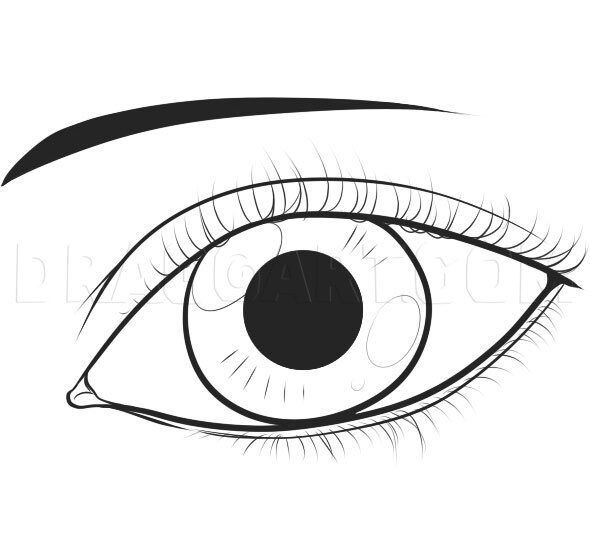
Step 6 of 7
Now that you've added the eyelashes and eyebrow, it's time to focus on the iris and pupil. Start by drawing a circle inside the eye for the iris, making sure it is centered. Then draw a smaller circle in the center of the iris for the pupil. To give it more depth, add a little sparkle to the pupil by drawing a small circle or white dot. This will make the eye look more alive!
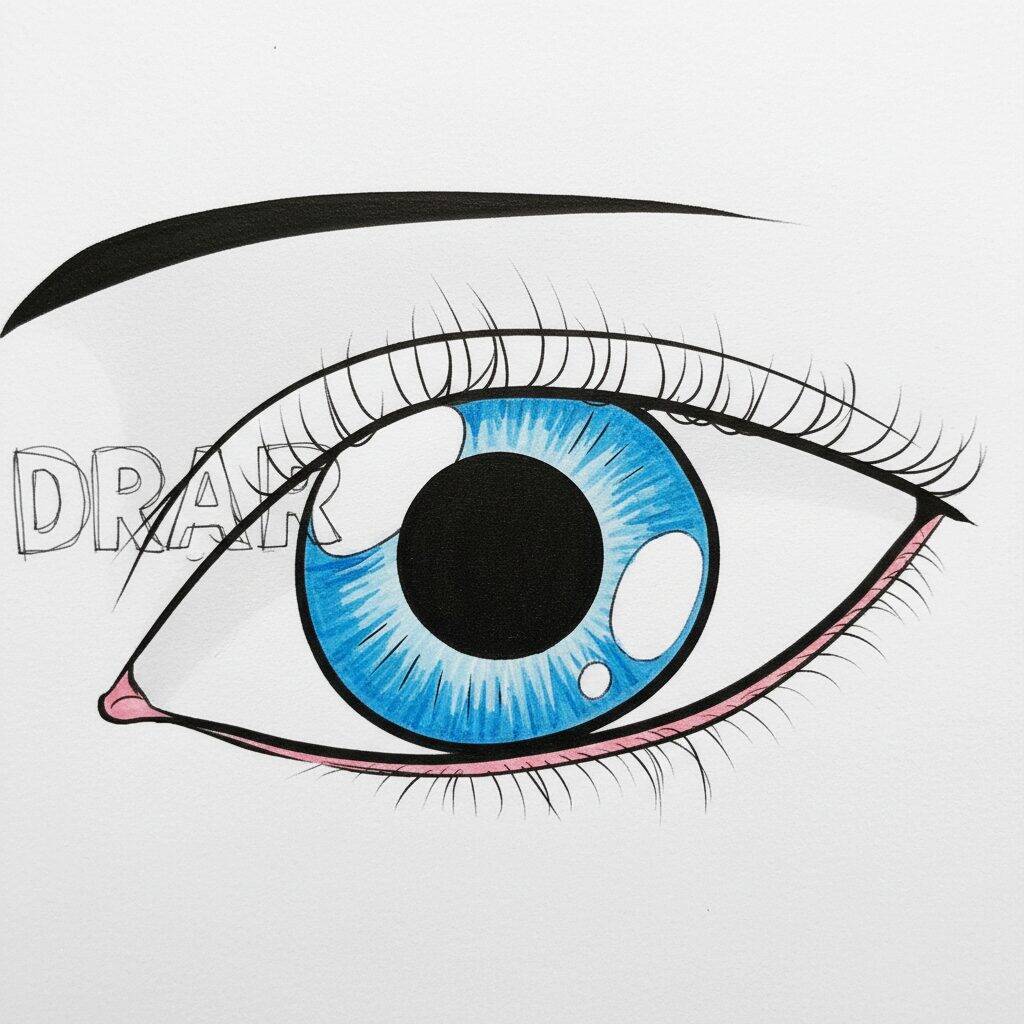
Step 7 of 7
Now that you've finished the iris and pupil, it's time to put the finishing touches on your drawing. Start by gently contouring the outside of your eye to better define its shape. Then add some thin lines to the iris to represent the textures and details. To finish, apply a light shadow around the eye and highlight the shine in the pupil with a touch of white, making the look more expressive. Ready! You have completed your eye drawing!