


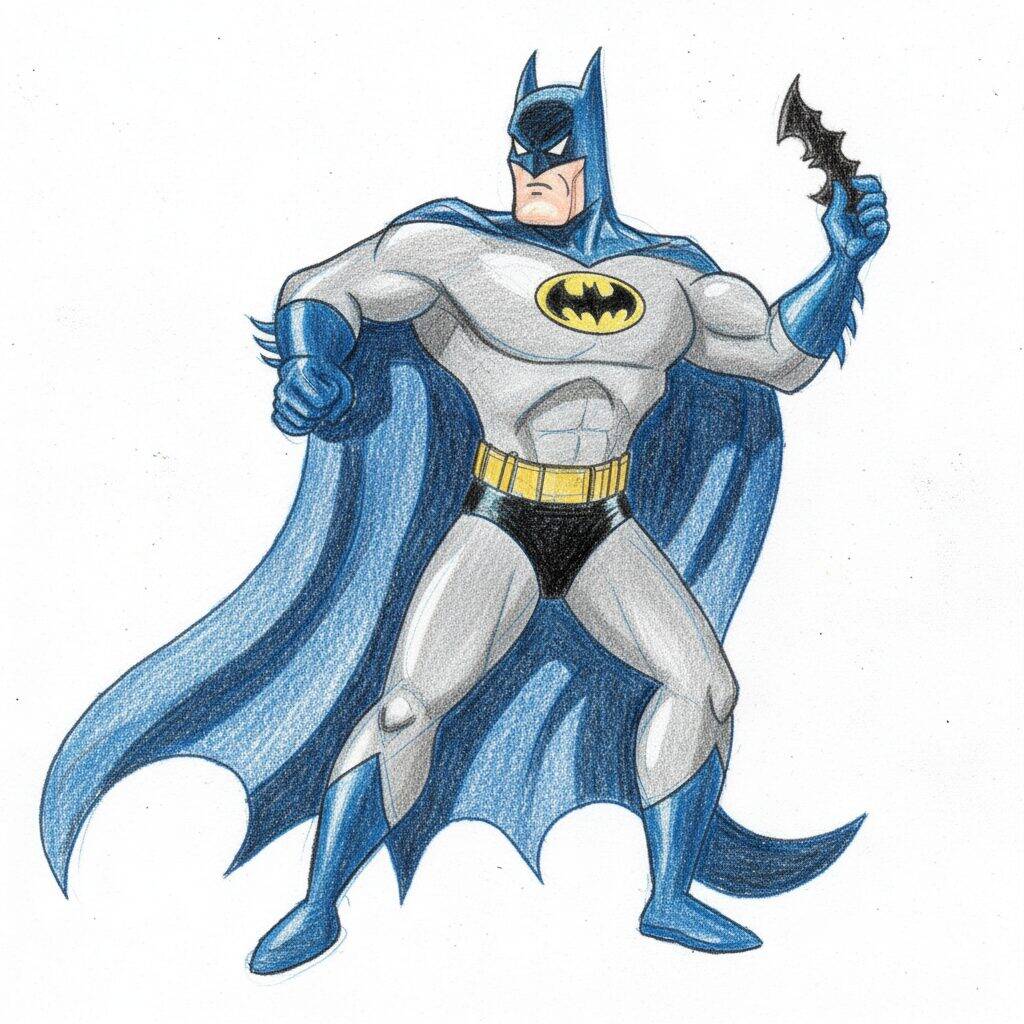
📐 How to Draw — Step by Step
Step 1 of 10
To start drawing Batman, let's focus on his head. Start by drawing an oval shape for the top of the head. Then add two pointy ears on top, which are Batman's signature features. Draw a curved line at the bottom of the oval to form the chin. Don't worry about details for now; just focus on the basic shapes.
Step 2 of 10
Now that Batman's head is ready, let's add the body. Start by drawing a curved line that goes down from the side of the head, forming the neck and part of the torso. Next, draw a muscular arm coming out of the torso, with the hand clenched into a fist. Remember to give your arm muscle a defined shape. Focus on the basic shapes and don't worry about details at this stage.
Step 3 of 10
Now that we have the base of the body, let's go into a little more detail. Start defining the shape of the torso, adding a curved line to add volume to the chest. Then draw the other arm, keeping the same position as the closed fist. Remember that the arm should look muscular, so add some volume to the muscles. Focus on keeping the proportions correct and follow the guidelines you've already drawn.
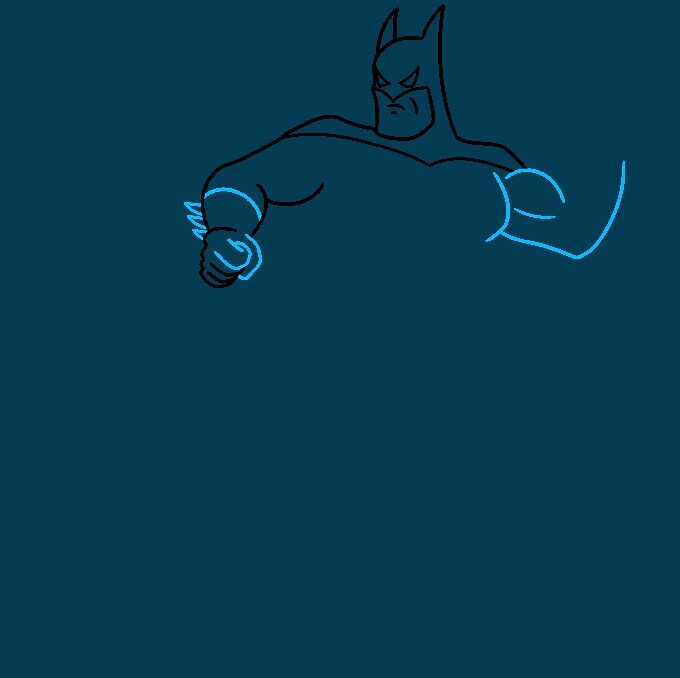
Step 4 of 10
Now that Batman's legs are drawn, let's focus on the arms. Start by drawing the upper arm, which should be wider, and then draw a line that tapers towards the forearm. Add an outline for the hands, remembering that Batman is in an action position, so position the hand in a firm gesture. Don't worry about the glove details yet; just establish the basic shape.
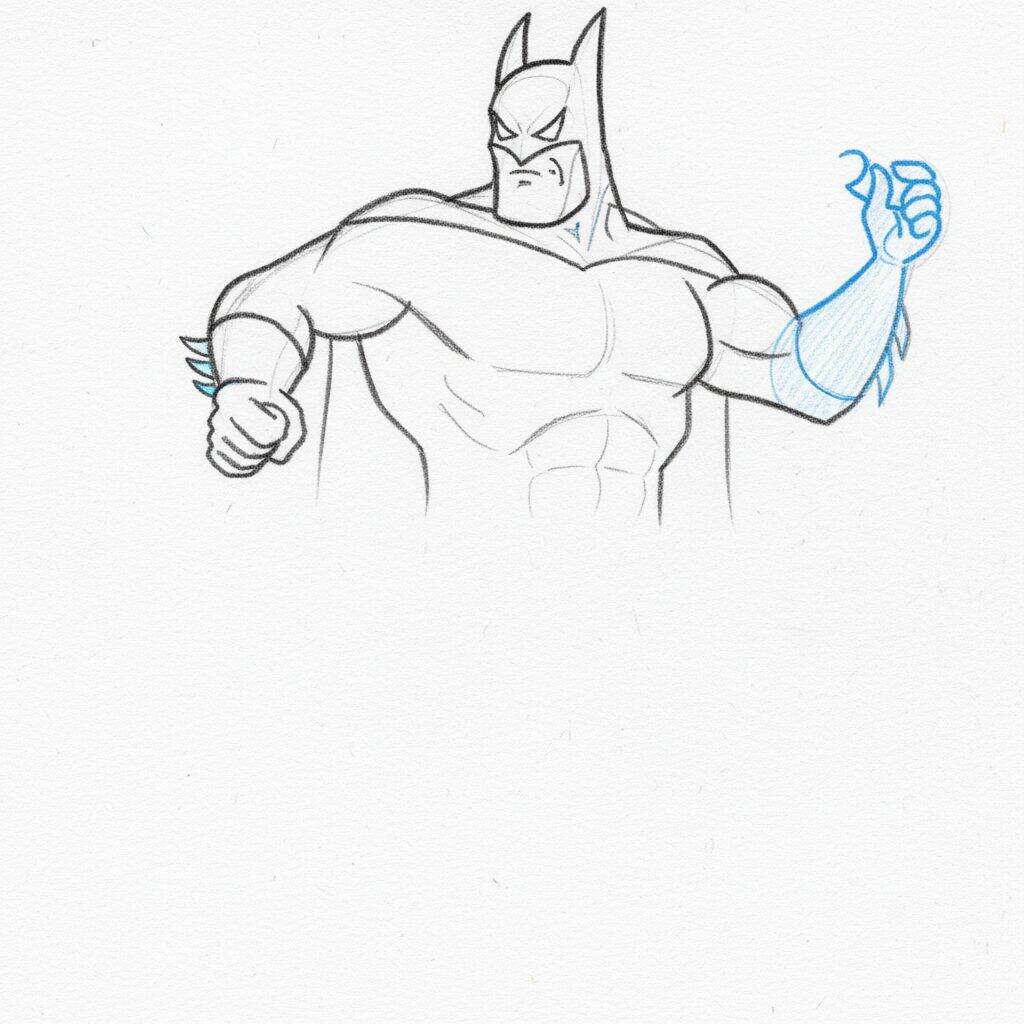
Step 5 of 10
Now that you've sketched out the upper parts of the arms, let's add more details. Start by defining the shape of the hands, adjusting the fingers so they look steady and ready for action. Draw the hand that holds the Batarang, paying attention to its position and shape. Remember, Batman is in a dynamic pose, so make the hand look steady and powerful. Finally, refine the lines of the arms to give a more muscular and defined appearance.
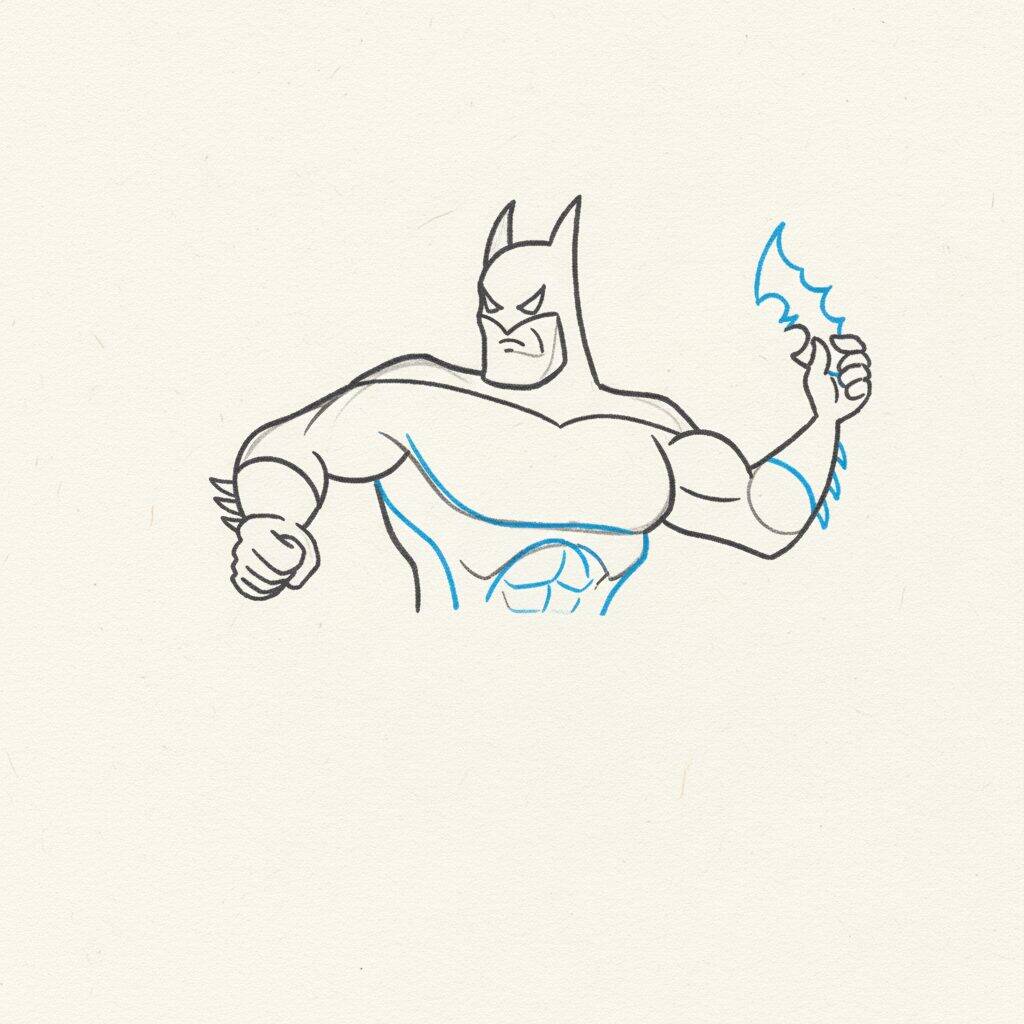
Step 6 of 10
Now that you've detailed the hands, let's focus on Batman's torso. Start by drawing the shape of the torso, emphasizing the pectoral and abdominal muscles. Draw the waist line by adding a belt that is well defined. Remember that Batman has a strong silhouette, so make the body lines more angular and robust. Finally, adjust your lower torso so that it connects harmoniously with your legs, keeping the pose dynamic.
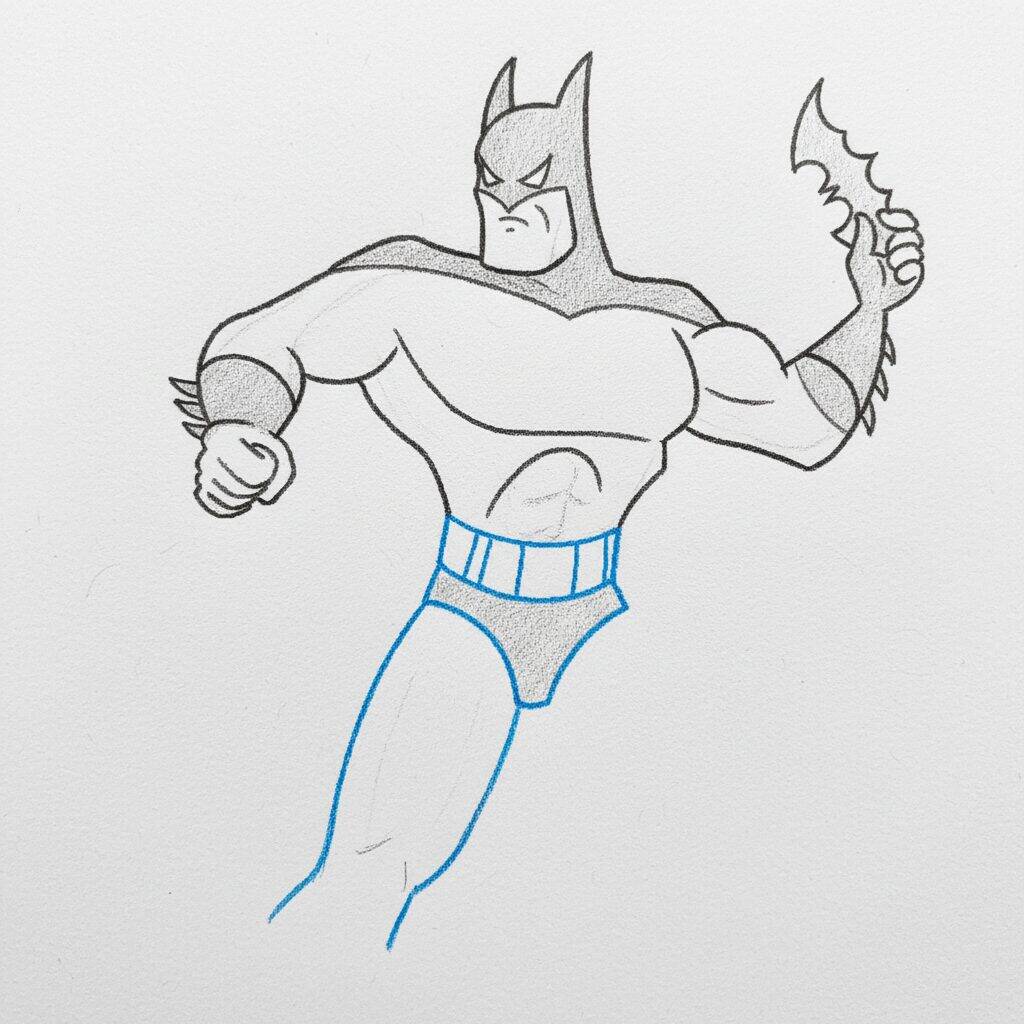
Step 7 of 10
Now that you've defined Batman's torso, let's work on the legs. Start by drawing the thighs, keeping the muscles in evidence. Make the legs a little wider at the top and taper them towards the feet. Draw the knees with a slight outline, and don't forget to add the boots, which should have a robust and angular shape, following the character's aesthetic. Finish with details that suggest movement, bringing Batman's pose to life.
Step 8 of 10
Now that Batman's arms are detailed, let's focus on the lower body. Start by drawing the legs, ensuring they have a muscular, robust shape. Add some lines to define the knees and thigh muscles. Next, draw the bottom part of the cover, which should flow naturally, giving the impression of movement. Remember to keep the lines firm and angular to capture the strength of the character.
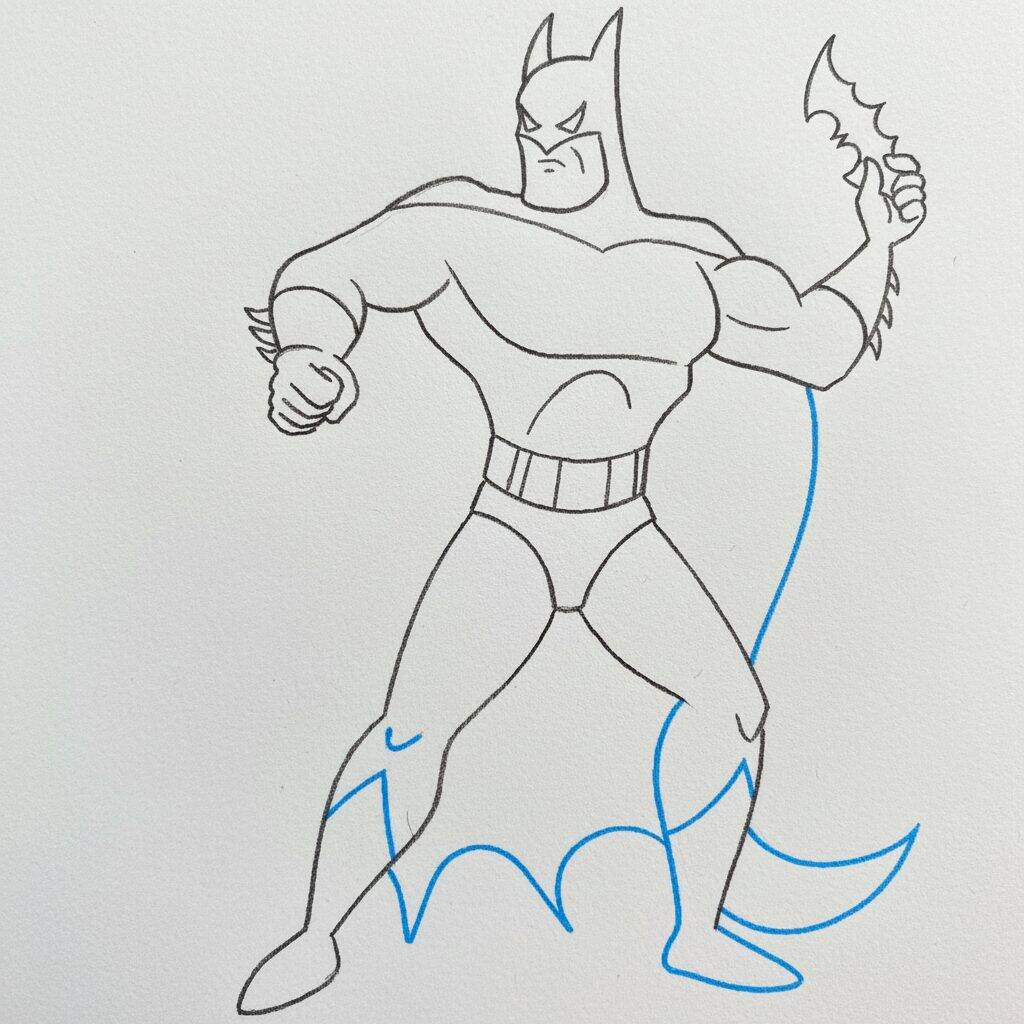
Step 9 of 10
Now that the legs and bottom of the cape are drawn, let's add the final details to Batman. Start by sketching the belt, which should be wide and with visible buckles. Then add the lines that define the abdominal muscles, creating a more athletic look. To finish, draw the Batarang in his hand, making sure to capture the sharp, dynamic shape of the weapon. Remember to maintain the character's rugged, angular style!
Step 10 of 10
To finish your Batman drawing, start adding details to the belt, drawing visible buckles and a wide shape. Then highlight the abdominal muscles with soft lines, giving an athletic appearance. Lastly, draw the Batarang in his hand, capturing its sharp, dynamic shape. Remember to maintain the robust and angular style that characterizes the character!