


📐 How to Draw — Step by Step
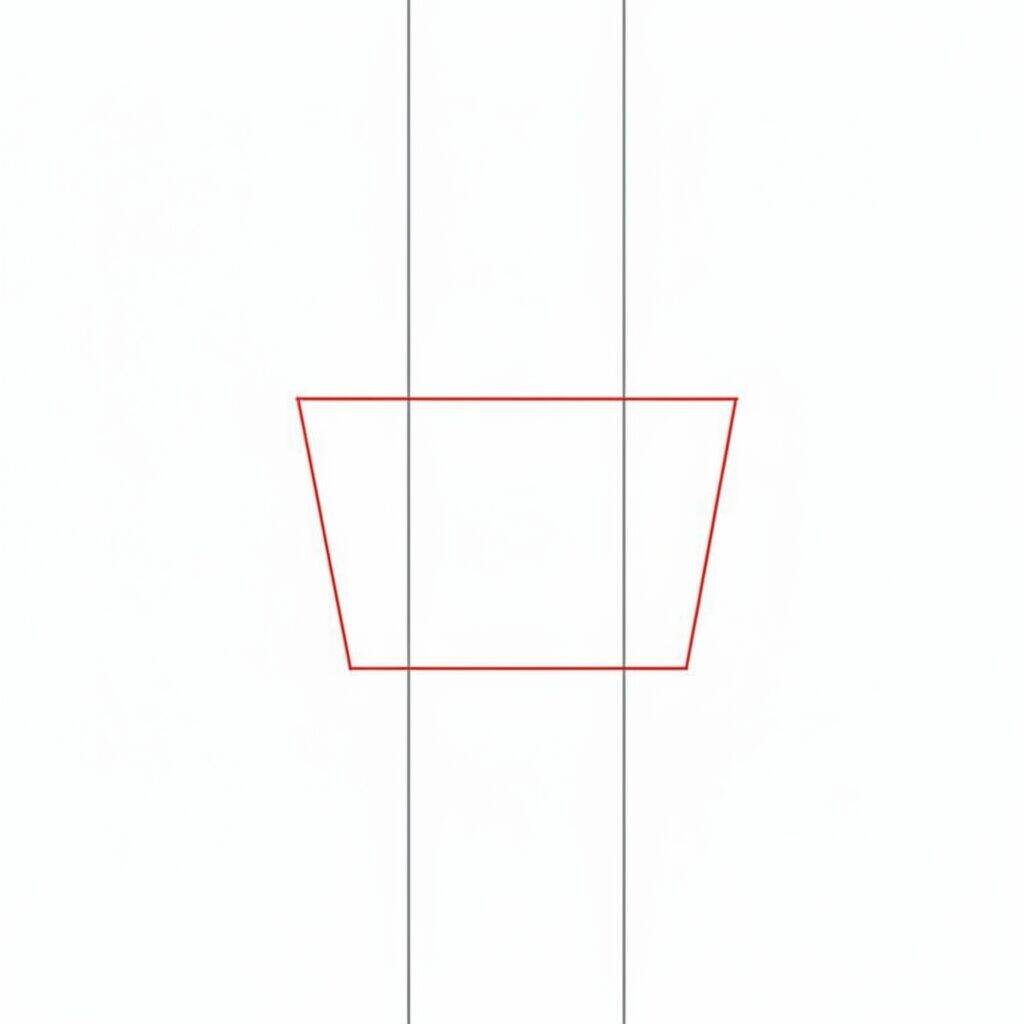
Step 1 of 6
To start drawing Steve from Minecraft, make a rectangular shape at the bottom of the paper, which will be the base of the body. Then, draw a vertical line in the center to divide the body into two equal parts. Then add a horizontal line across the top of the rectangular shape, creating a trapezoid-like shape. This will be the base for the character's head and torso.
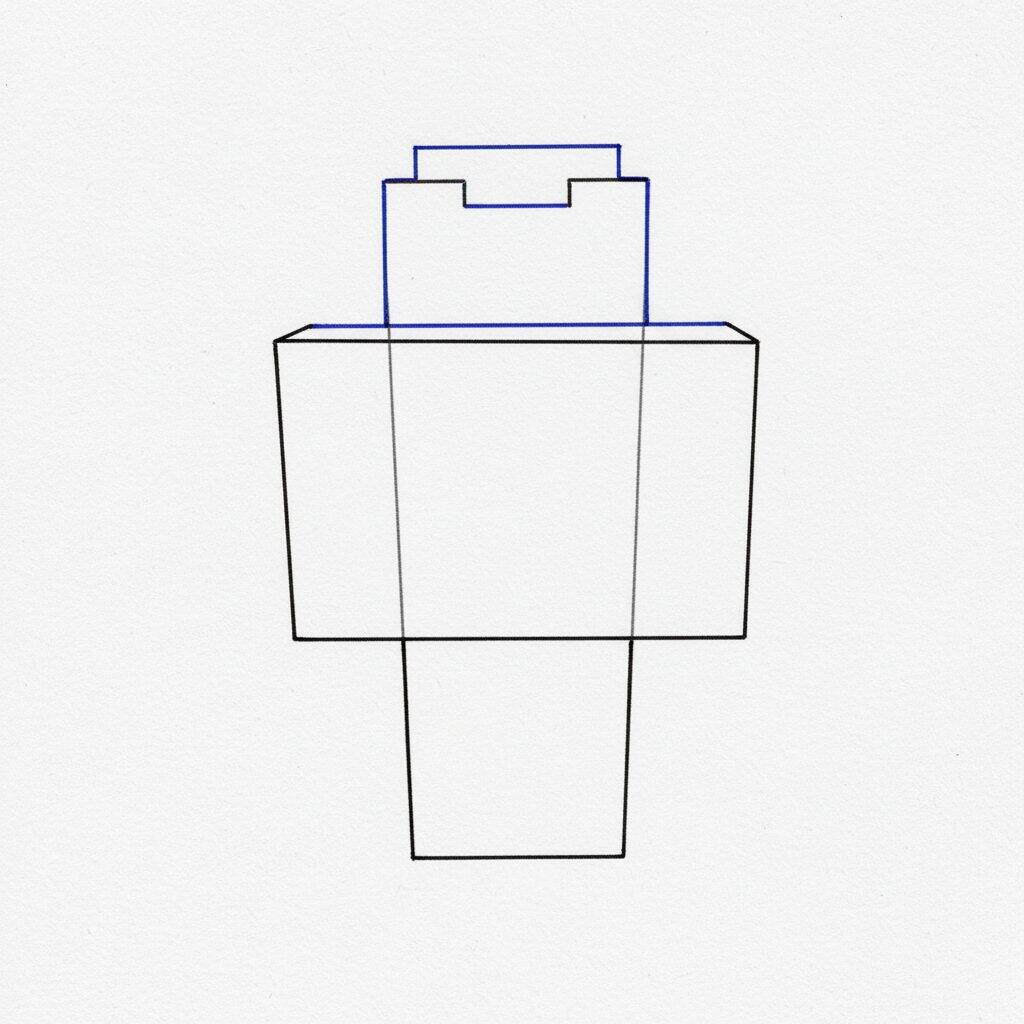
Step 2 of 6
Now that you have the base of the body and head, let's add more details. Start by drawing the top part of the head, which has a square shape. Next, refine the outline of the torso, making it wider at the top and a little narrower at the bottom, to give it a more three-dimensional shape. Remember to keep the lines straight and angular, characteristic of the Minecraft style.
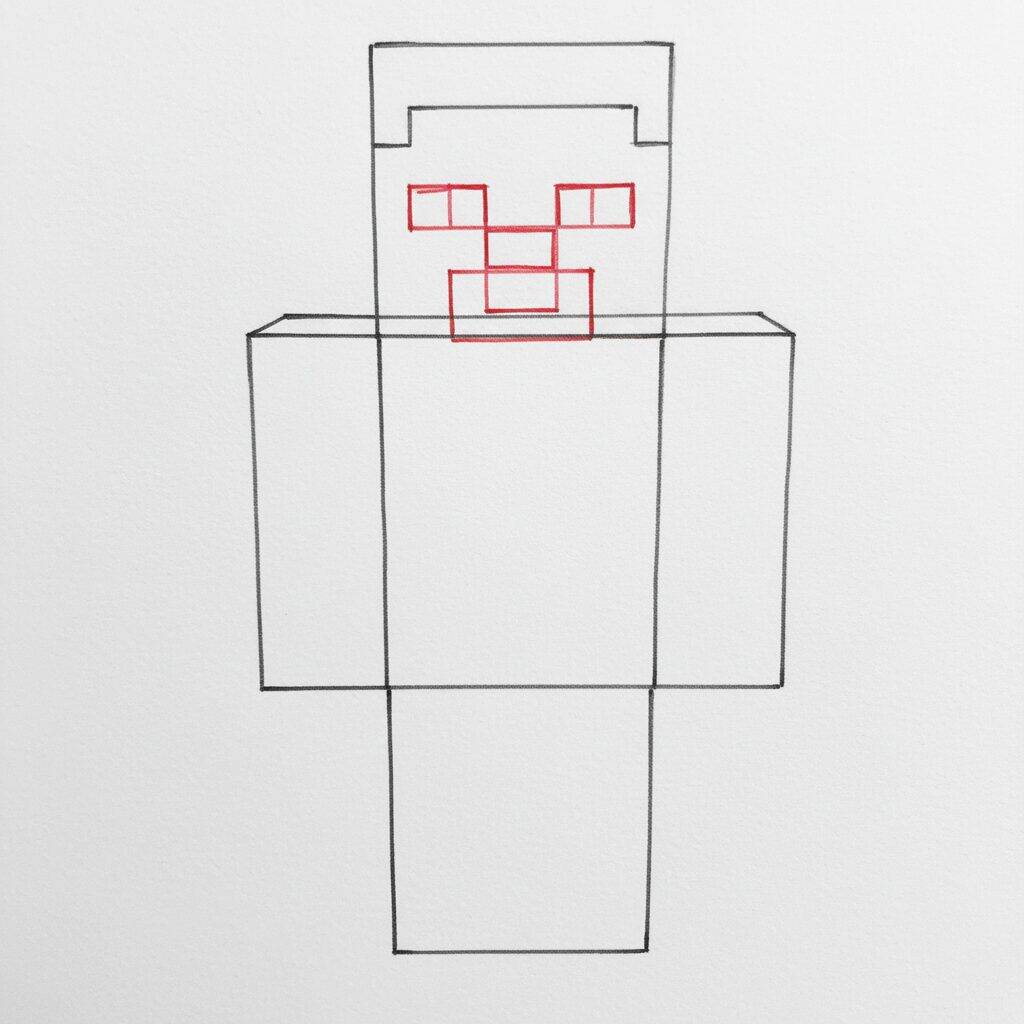
Step 3 of 6
Now that you've refined the head and body, let's focus on Steve's face. Start by drawing the eyes, which are square and positioned at the top of the face. Then, add a smaller rectangle for the nose, just below the eyes. For the mouth, draw a simple horizontal line, which should also be rectangular. Remember to keep the lines straight and angled to reflect the Minecraft style.
Step 4 of 6
Now that you've drawn the eyes, nose and mouth, let's add more details to Steve's face. Start by refining your eyes, making them more defined and darker. Next, add the eyebrows, which should be rectangular and positioned just above the eyes. To finish the face, draw a light outline around the head, ensuring the angles remain sharp and square, maintaining the signature Minecraft style.
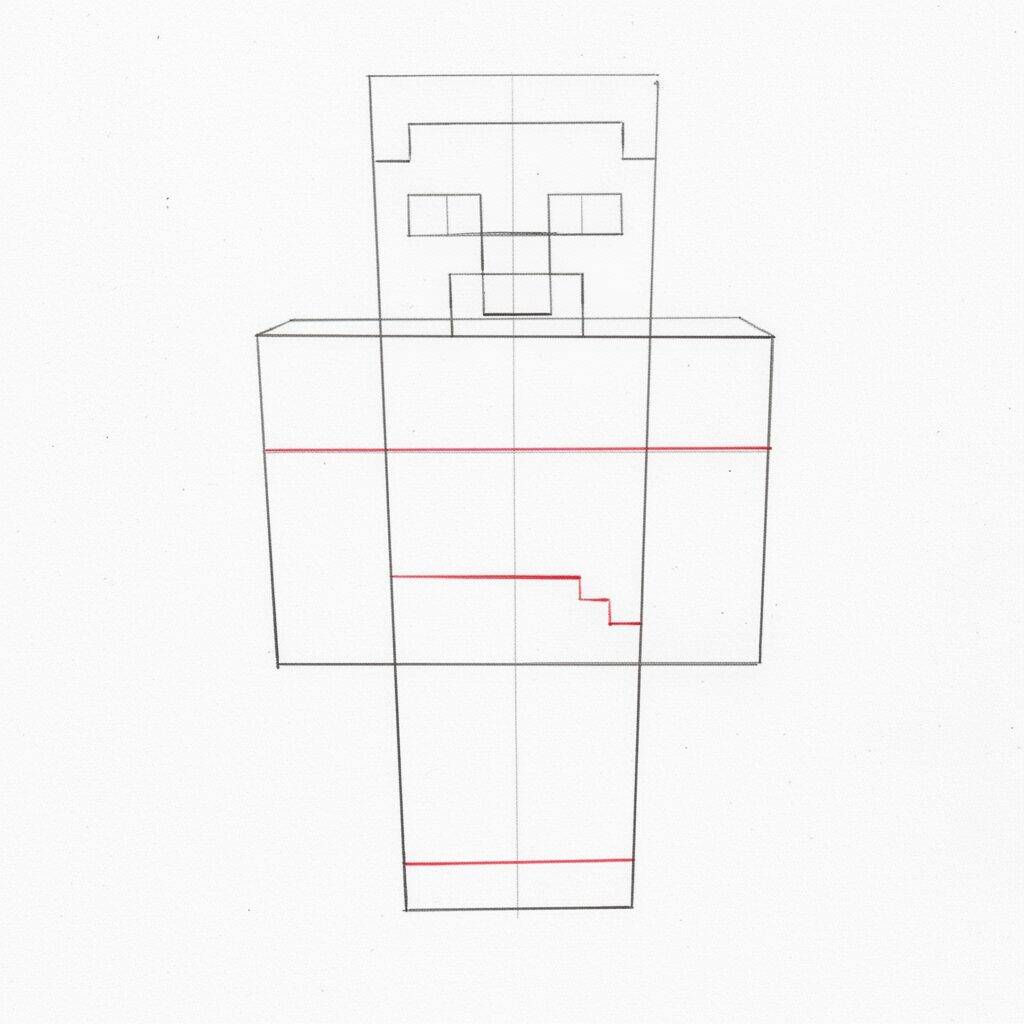
Step 5 of 6
For the next step, let's work on Steve's body. Start by drawing a large rectangle for the torso, ensuring its edges are straight and the angles are well defined. Next, draw two smaller rectangles for the arms, positioning them on either side of the torso. For the legs, draw two vertical rectangles at the bottom of the torso, keeping the same width as the arms. Remember to keep Minecraft's square, pixelated aesthetic!
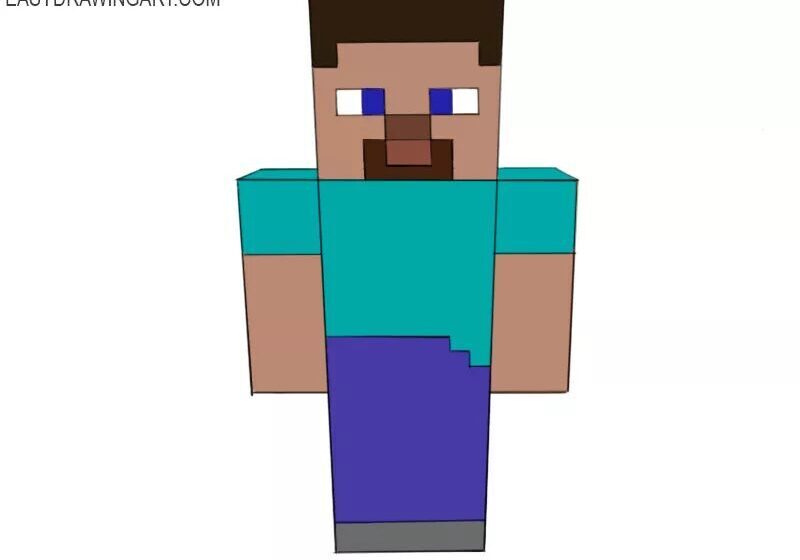
Step 6 of 6
To finish Steve's drawing, start adding details to the body you've already sketched. Draw his shirt, using straight lines to define the top and sleeve, ensuring the shape remains square. For the pants, draw a line at the bottom of each leg, creating a clear division between the shirt and pants. Lastly, add the face, drawing a small rectangle for the eyes and a square for the mouth, maintaining the pixelated Minecraft aesthetic.