

📐 How to Draw — Step by Step
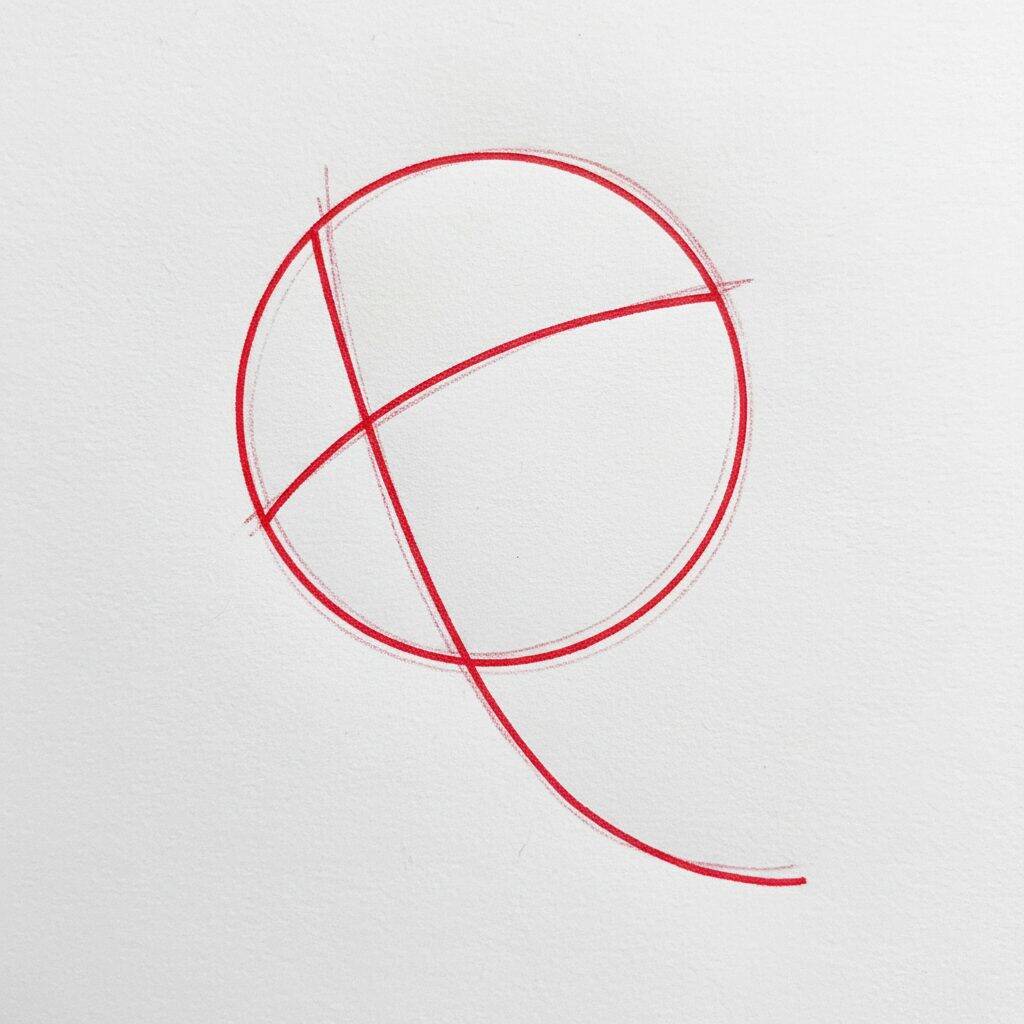
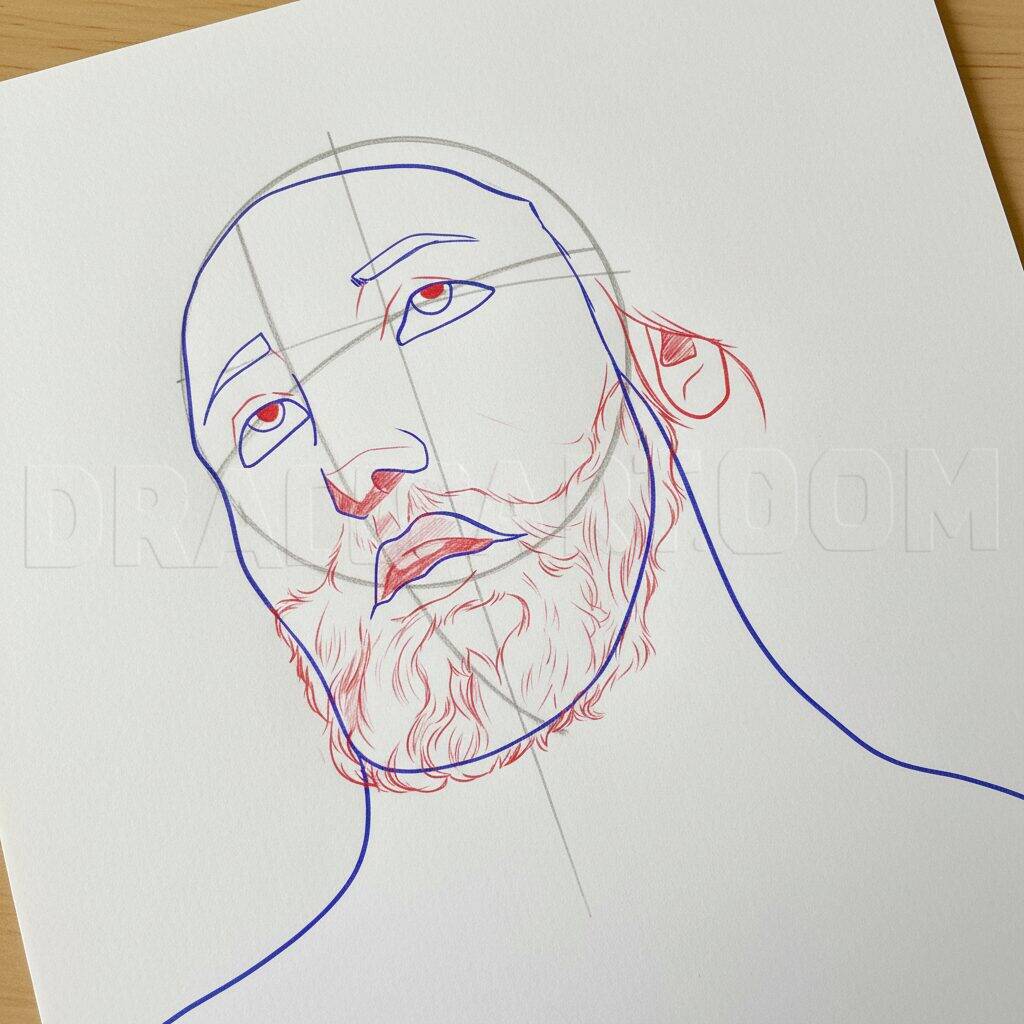
Step 1 of 8
To start drawing Jesus, draw a large circle that will represent the head. Then, draw a vertical line in the center of the circle, which will serve as a guide for the symmetry of the face. Then, draw a horizontal line that crosses the circle, dividing it into two parts. This structure will help position the facial features further forward. Finally, add a curved line at the bottom of the circle, which will serve as the base for the chin.
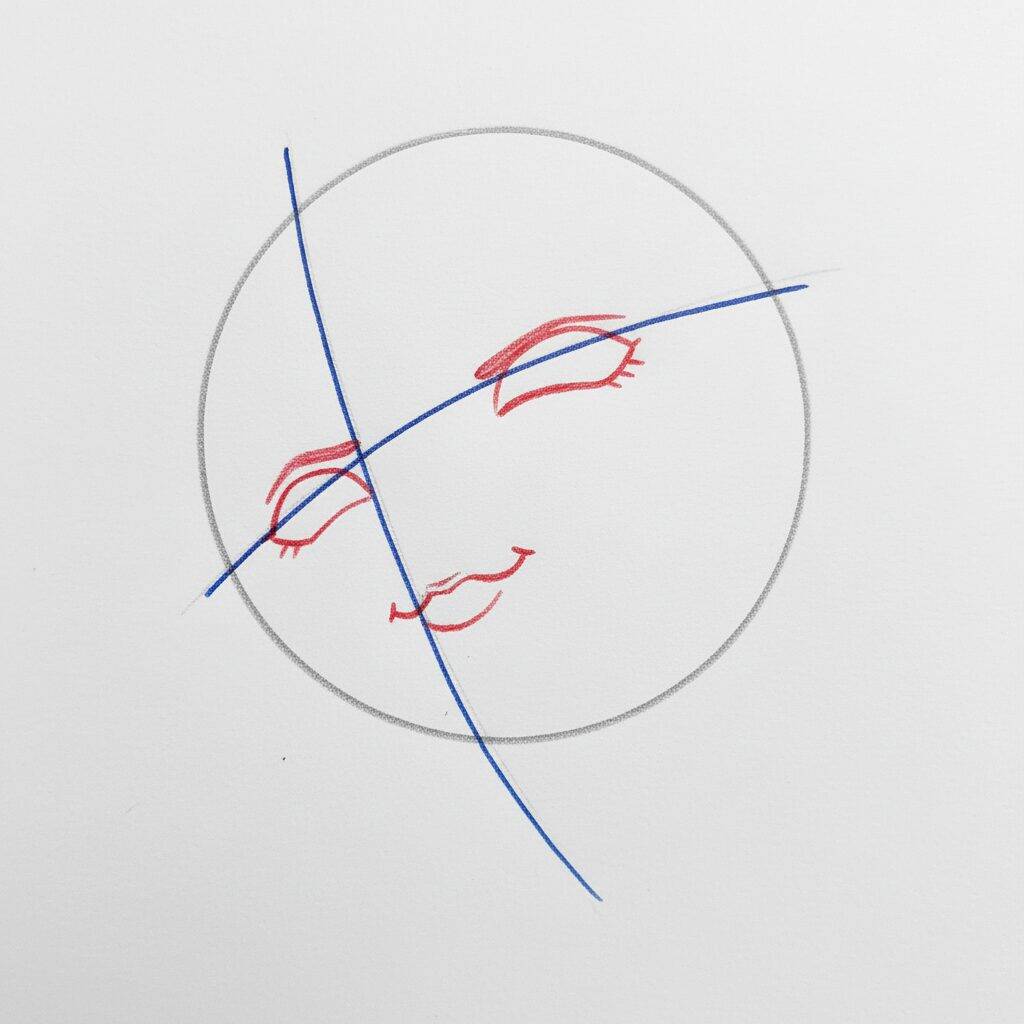
Step 2 of 8
Now, let's start sketching Jesus' facial features. Use the guide lines you drew to position the eyes. Draw a soft curved line to form the top of the eyelids, and draw a slightly arched line below to outline the eyebrows. Next, sketch the lips, starting with a simple line for the outline of the mouth. Remember to maintain symmetry when drawing both sides of the face.
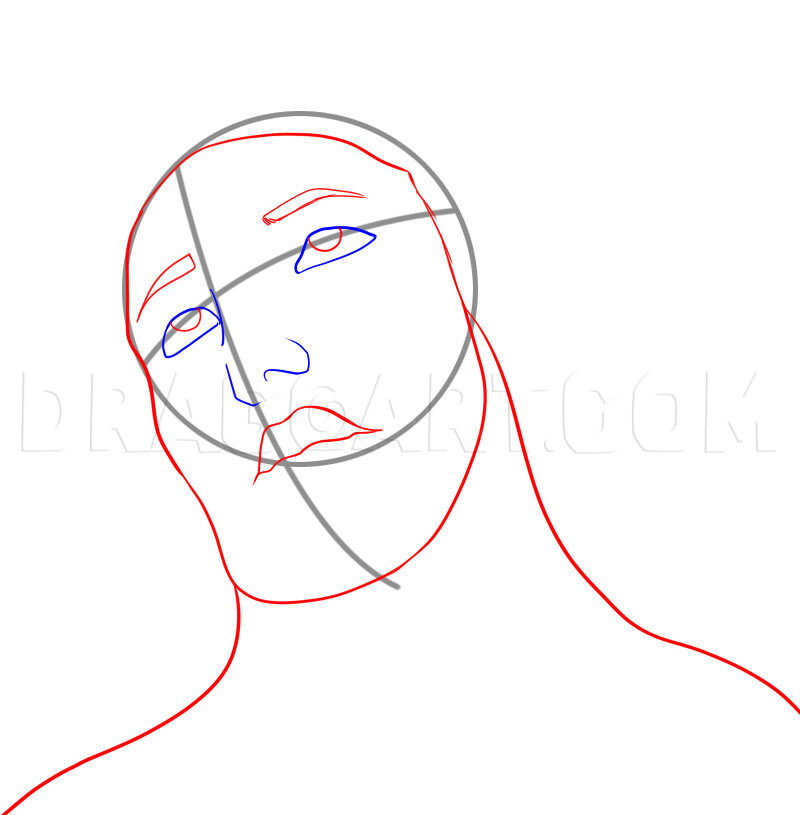
Step 3 of 8
Now, let's refine Jesus' facial features. Use the guide lines you drew to add more detail to the eyes by drawing the irises and pupils. Next, outline the shape of the nose, starting with a smooth line running from the top to the tip. For the mouth, add more contours to shape the lips, making them more defined. Remember to maintain proportions to ensure a harmonious face.
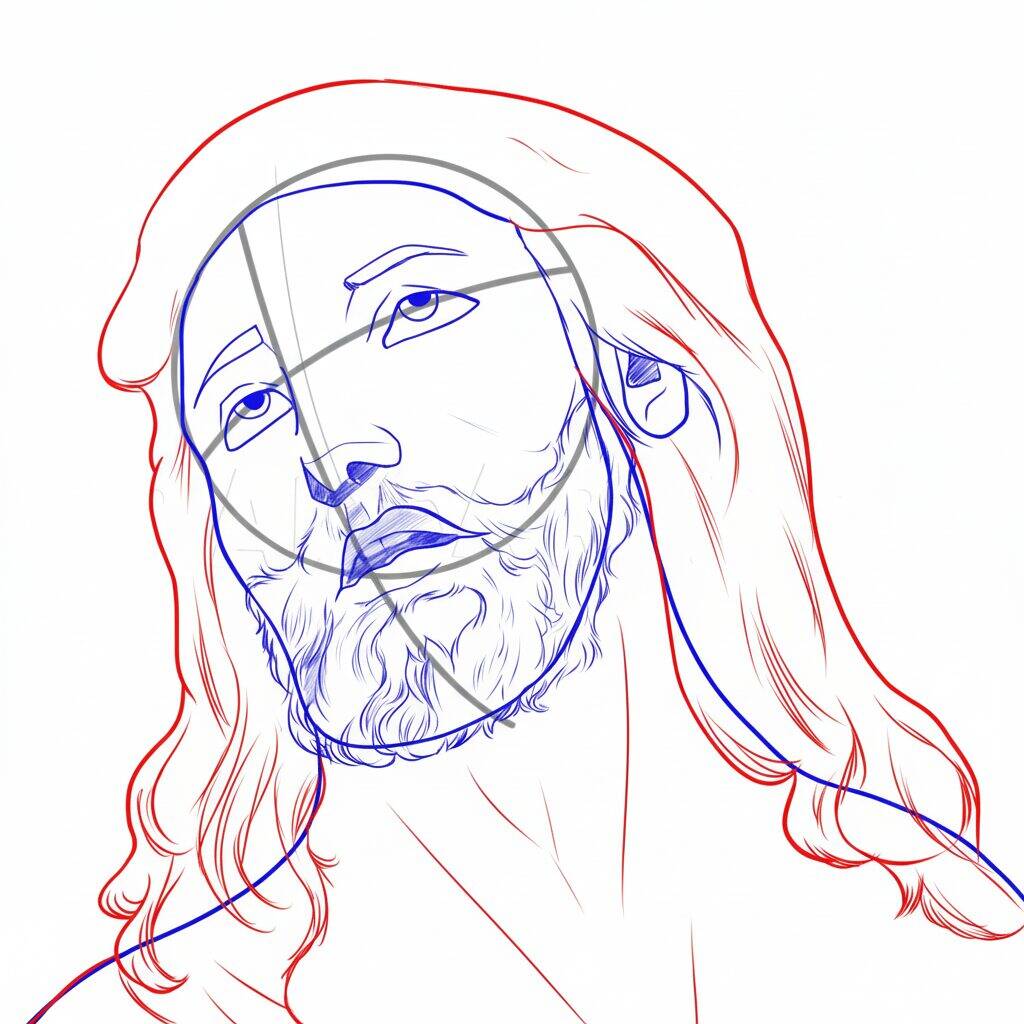
Step 4 of 8
Now let's work on the structure of Jesus' face. Start by defining the shape of your face, using soft lines to contour your chin and cheeks. Next, draw the hairline, which should be slightly wavy, following the shape of the head. Remember to add details to the beard, creating short, curved lines that imitate hair. These elements will help provide a solid foundation for the next details.
Step 5 of 8
Now that you have the basic structure of your face, it's time to add more details. Start defining the eyes by drawing ovals and positioning them according to the guide lines you created. Then add the eyebrows, which should be slightly arched, and start sketching the nose with a simple shape. For the mouth, draw a soft line that represents the lips, remembering to leave a slight space between them. These details will help bring your drawing to life.
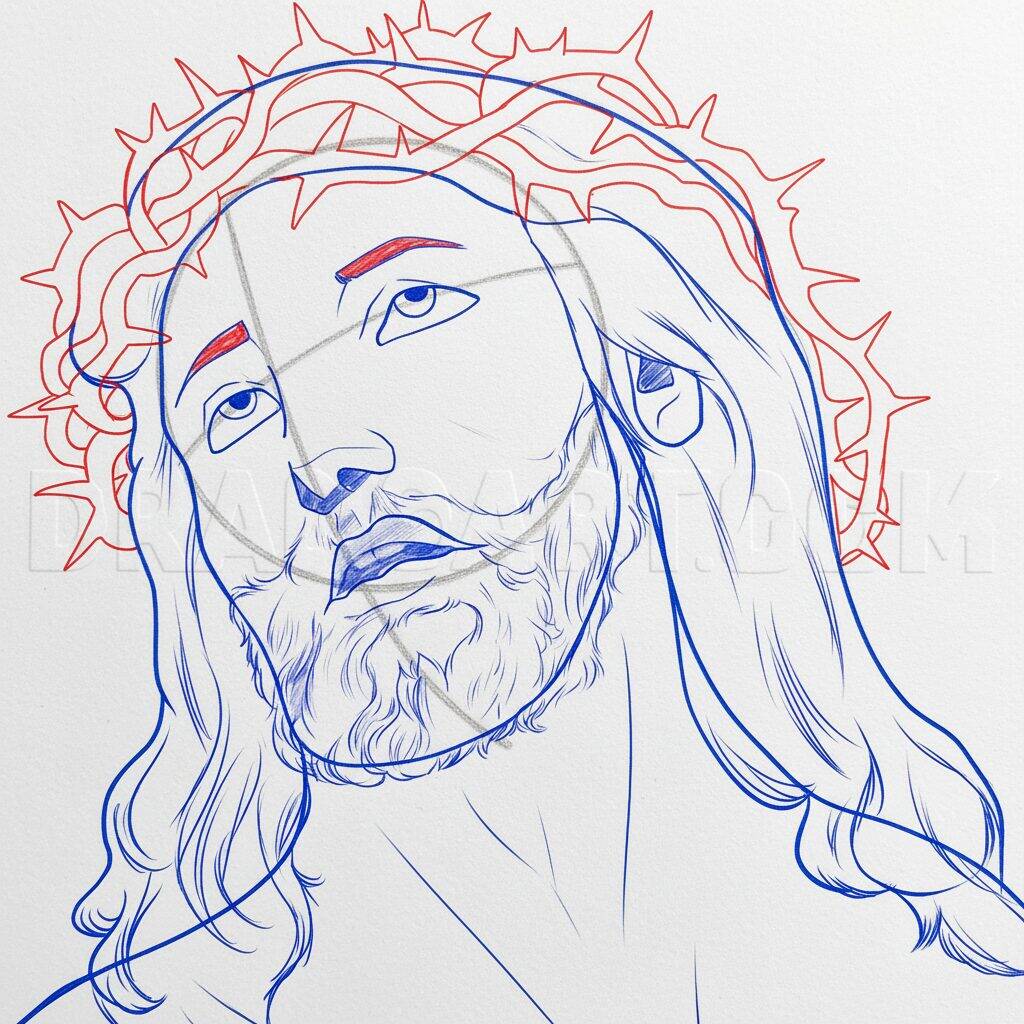
Step 6 of 8
Now that you've defined the eyes, eyebrows, nose and mouth, it's time to improve the details of the face. Start by drawing the shape of the hair, using wavy lines to represent the strands. Add volume to your hair while ensuring it has a natural flow. Then highlight the beard with soft lines, following the shape of the chin and neck. These details will give your drawing more realism.
Step 7 of 8
Now that you've honed in on the details of the face, let's focus on the crown of thorns. Start by drawing the spikes with triangular shapes, ensuring they look sharp and realistic. Add some shadow to the areas under the thorns to add depth. Then, use a vibrant green Coloring Page the crown, creating a contrast with the hair and face. This will help make the crown stand out in your artwork.
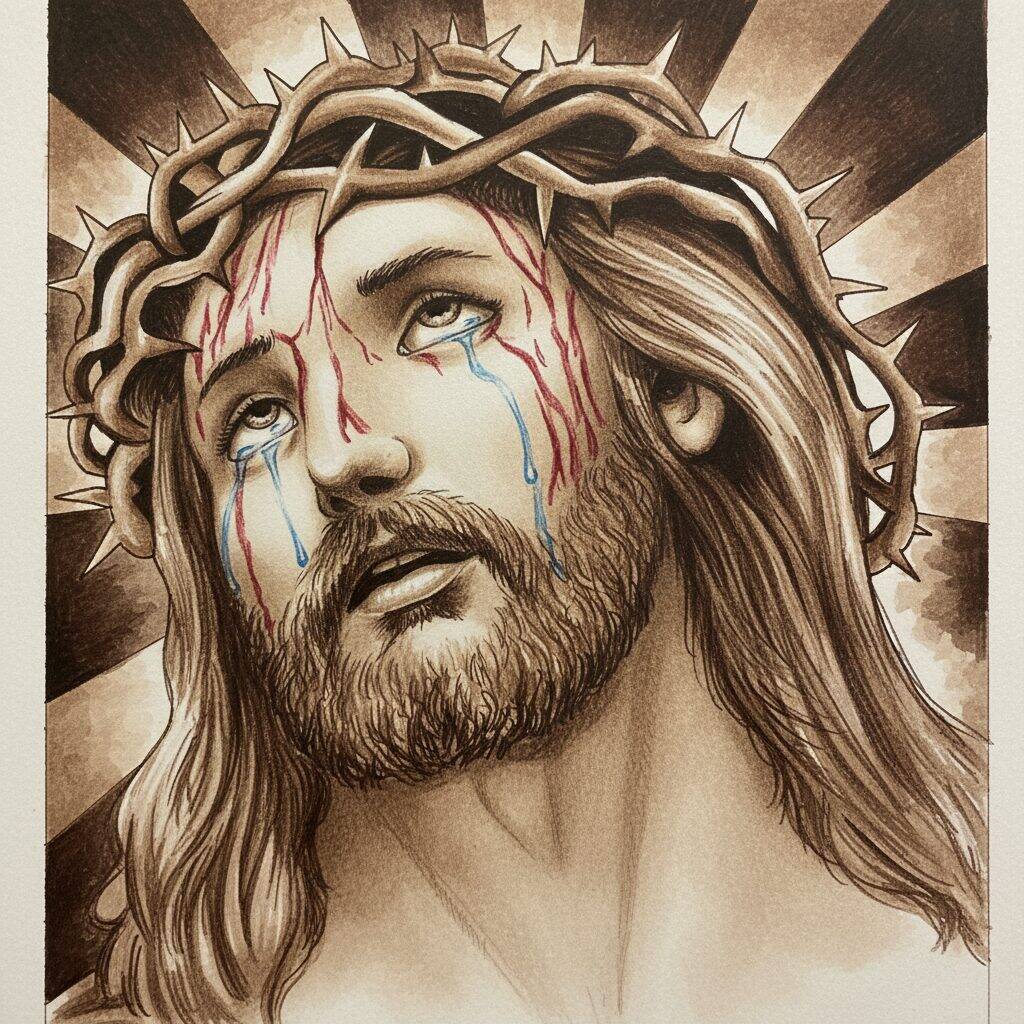
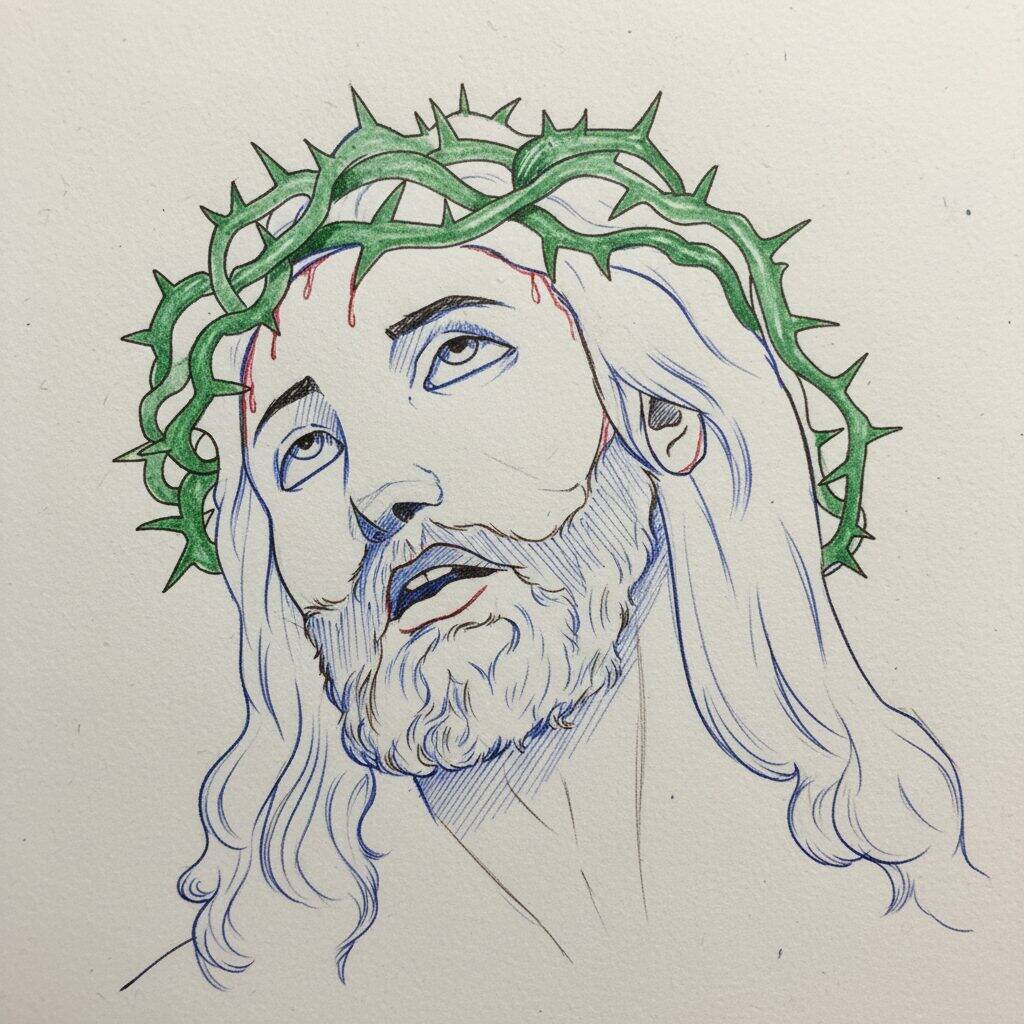
Step 8 of 8
To finish your drawing of Jesus, add the last details. Use a darker pencil or pen to reinforce the lines on the face and crown of thorns. Apply subtle shading to areas that need more depth, like under the chin and around the eyes. For a finishing touch, consider adding a background with rays emitting from the face, highlighting the central figure and creating a dramatic atmosphere. That’s it, your drawing is complete!