

📐 How to Draw — Step by Step
Step 1 of 7
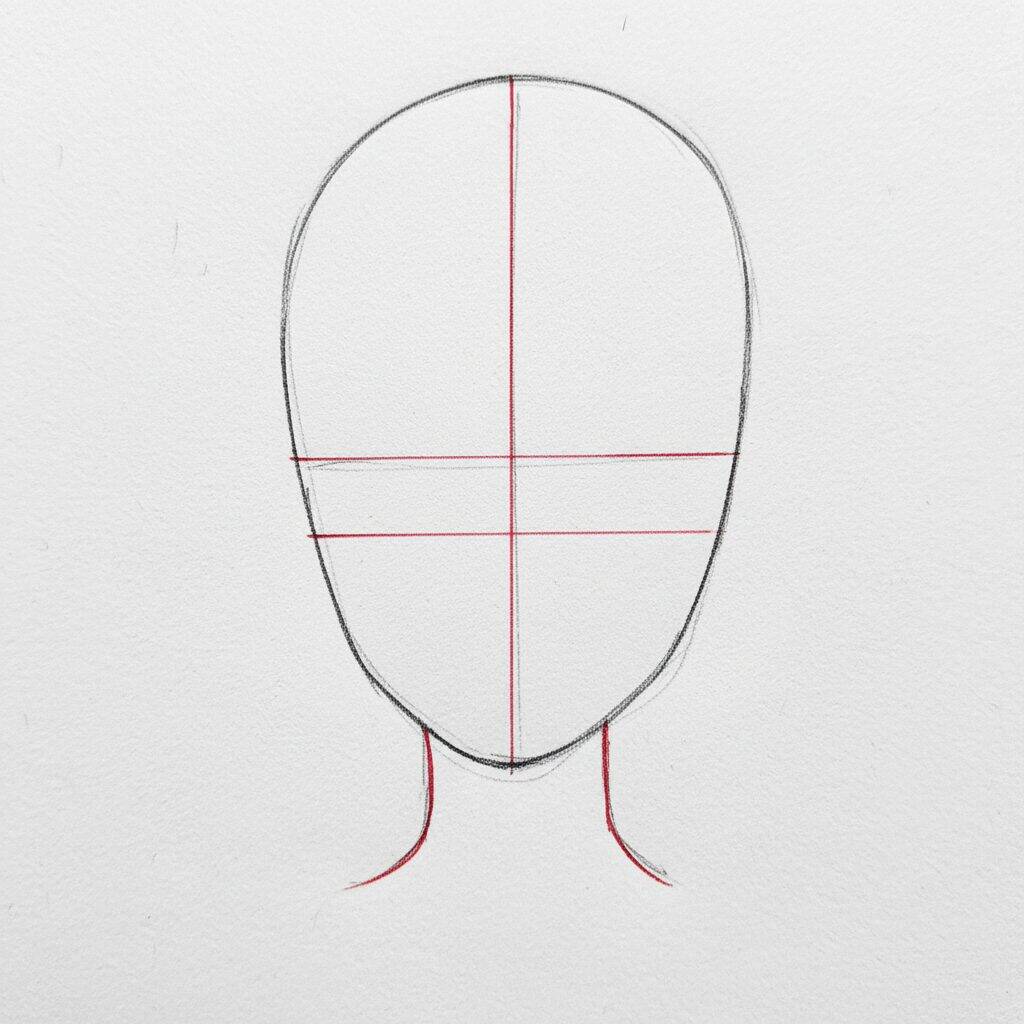
To start drawing an anime character's head, draw an oval that represents the head. Then add two intersecting lines: a horizontal one in the middle and a vertical one running from top to bottom. These lines will help position the eyes and other details later. Don't forget to draw a small “V” at the bottom to indicate what the chin will be.
Step 2 of 7
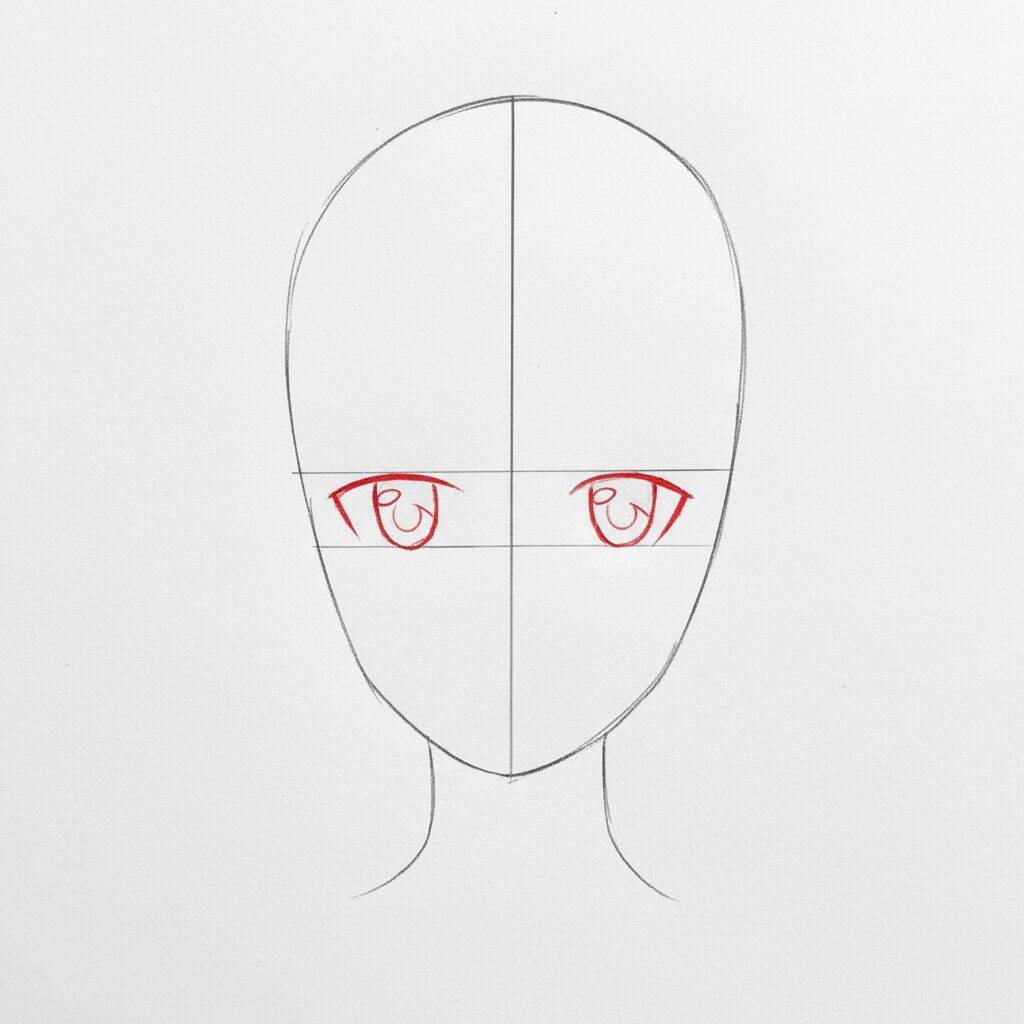
Now, let's start drawing your character's eyes. Using the guide lines you drew earlier, draw two ovals for the eyes, placing them on the horizontal line. Inside each oval, add a smaller circle for the iris and a dot for the pupil. Don't forget to add a sparkle to your eyes by drawing a small circle or oval at the top of your irises. This will bring your character to life!
Step 3 of 7
Now, let's add eyebrows to your character. Using the lines you drew earlier as a guide, trace two arched shapes above the eyes. Eyebrows should have a slight angle, giving your character an expression. Keep in mind that the thickness and shape may vary, so feel free to customize them! This will help give your drawing more personality.
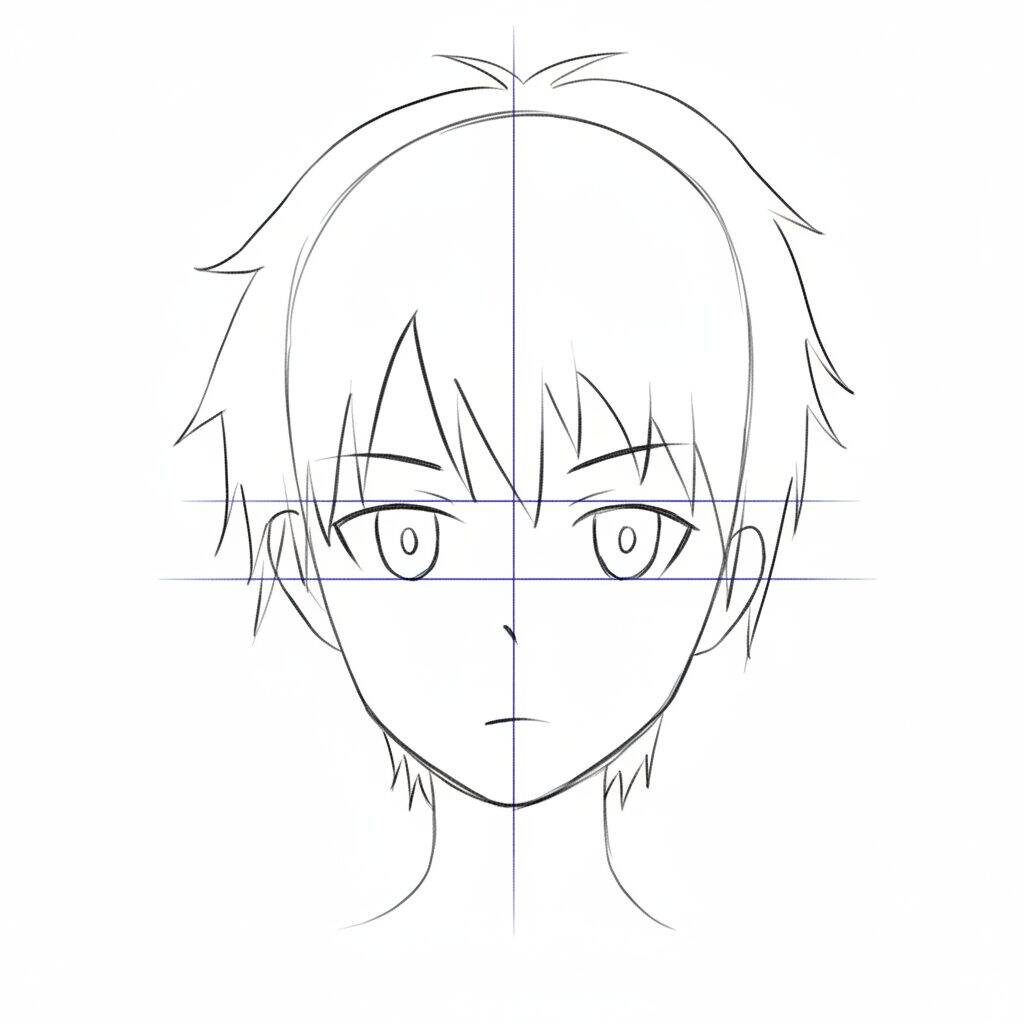
Step 4 of 7
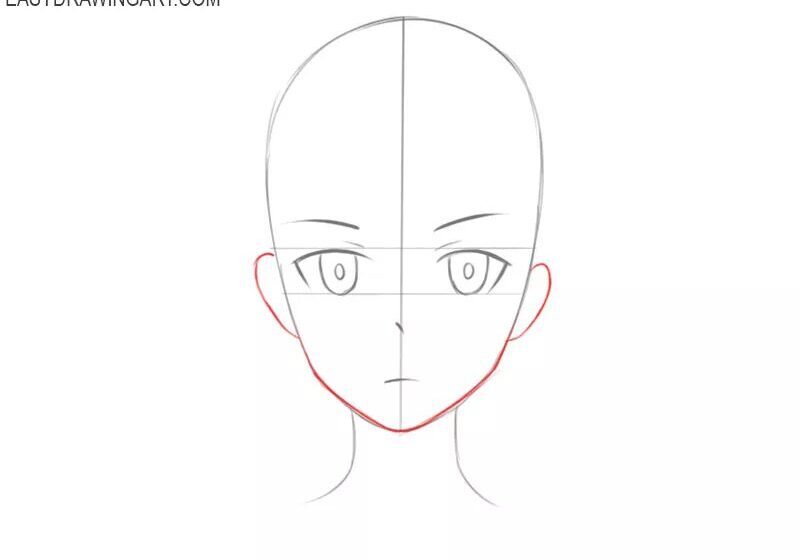
Now that the eyebrows are in place, let's focus on your character's mouth and chin. Start by drawing a smooth line at the bottom of your face to define your chin. Then add a curved line that represents the mouth, positioning it between the eyes. This line can be more subtle or more pronounced, depending on the expression you want to give your character. Remember that small details make all the difference!
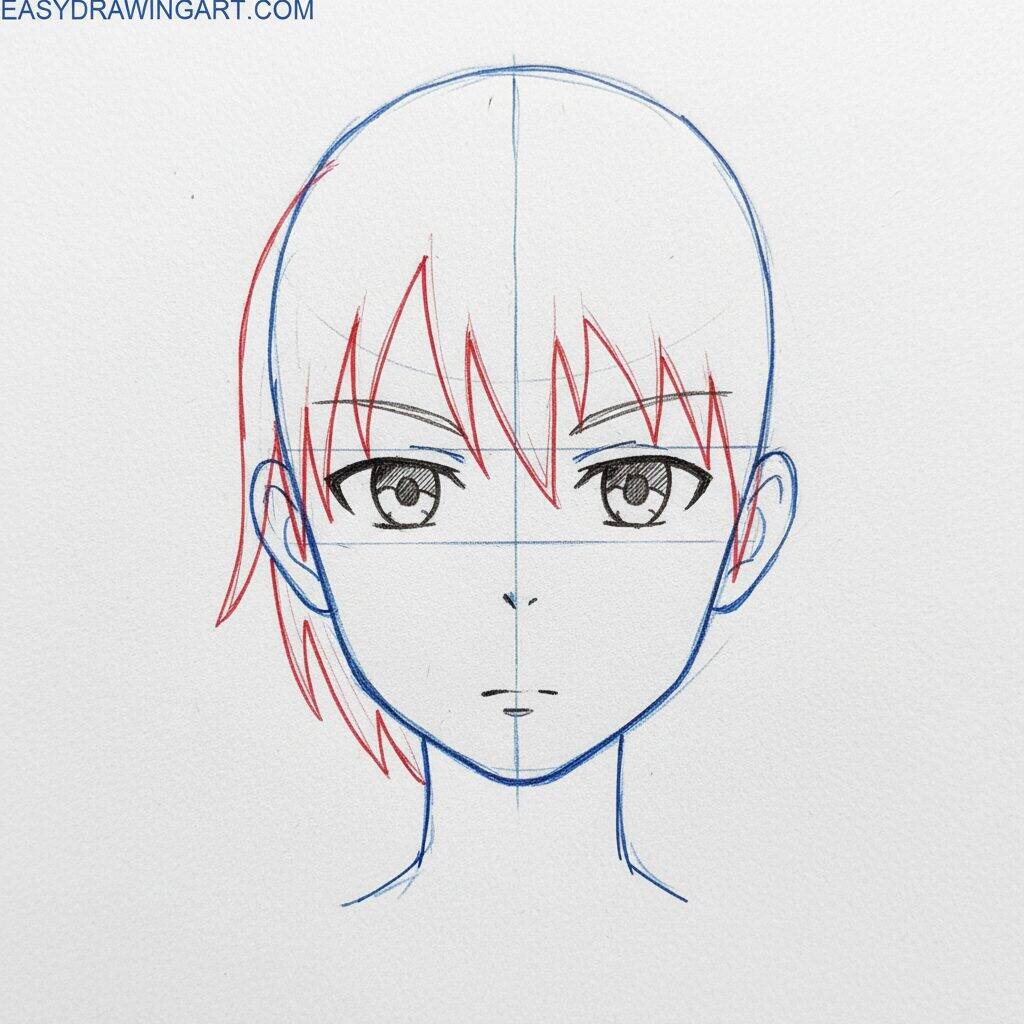
Step 5 of 7
Now that you've defined the chin and mouth, let's work on your character's hair. Start by drawing lines that follow the shape of the head, creating the contours of the hair. Remember that hair can come in different shapes and styles, so feel free to add highlights or layers. Use soft, flowing lines to give a more natural effect, and don't worry about being perfect; the important thing is to capture the essence of the style you want!
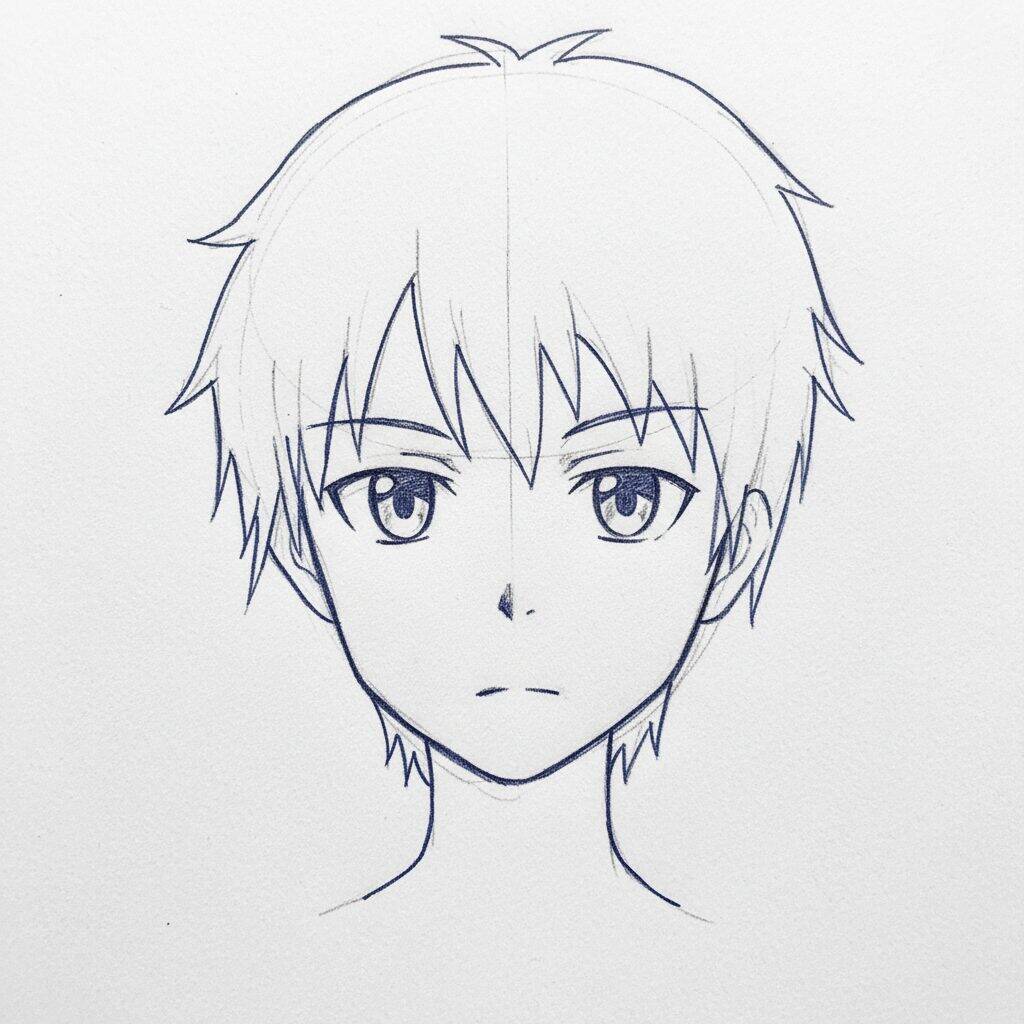
Step 6 of 7
Now that you've sketched out the hair, let's work on the details of the face. Start by defining the eyes by drawing an oval shape for each one, following the guide lines you drew earlier. Add the eyelids and eyebrows above the eyes, ensuring they are aligned. Don't forget to include the irises and pupils, giving an expressive touch to the look. Remember that eyes are an important part of your character's personality!
Step 7 of 7
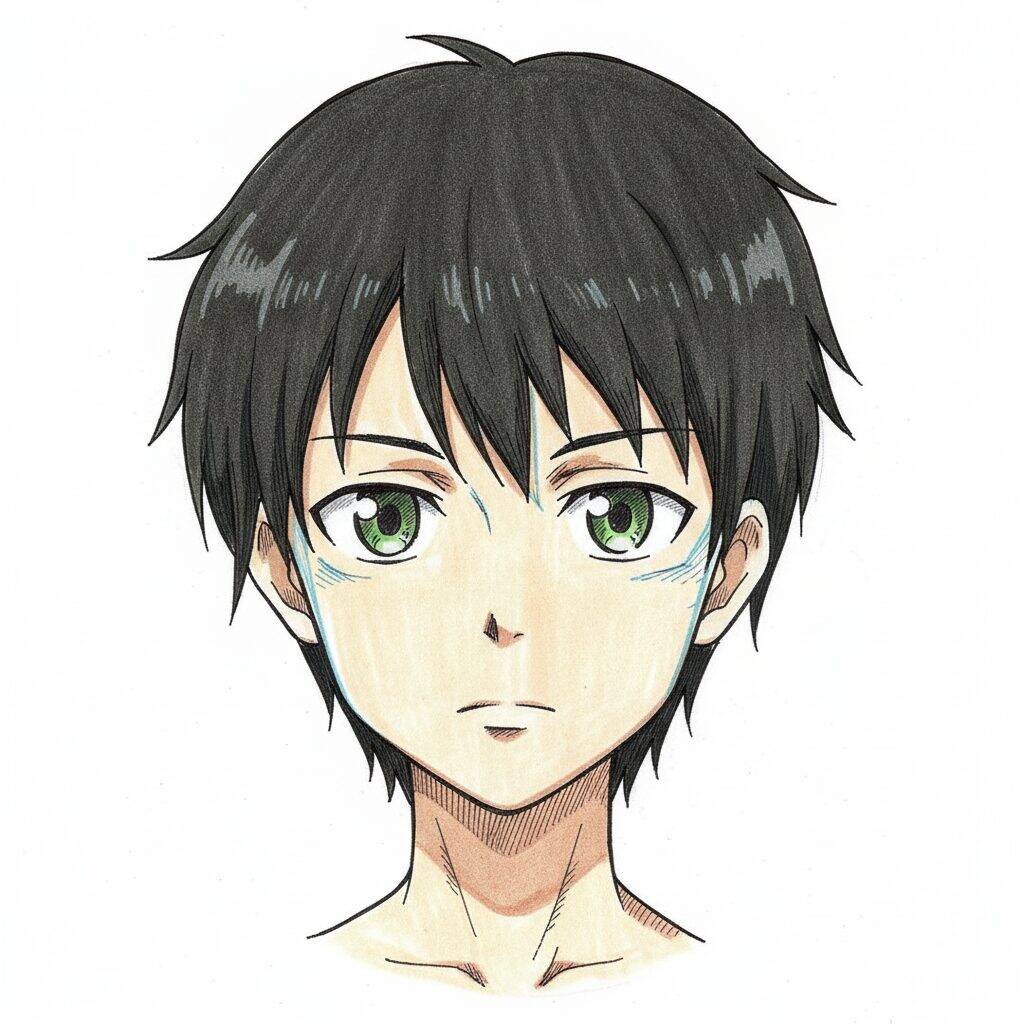
Now that you've finished the face details, it's time to finalize your drawing! Start by gently erasing the guide lines that are no longer needed. Then, refine the lines of the hair, eyes, nose and mouth, making them more defined and clean. You can add some strokes to give texture to the hair and light shading to the face for a more three-dimensional effect. Finally, if you wish, use pens or colored pencils to bring your character to life. Congratulations, you have completed your anime drawing!